How to setup a POP3 account on iPhone & iPad
The following tutorial is provided as a courtesy to our customers to help you configure your mail software to work with Namesco mail solutions.
Note: Third-party software cannot be supported directly by Namesco. If you cannot find the exact software version you are using or have further questions about configuring your iPhone for any reason, please visit: Apple – Support – Mail section
Note: As new models and OS updates are released, the screen you see on your own device may differ from those displayed in this guide. Regardless of this, the steps detailed in this guide are always kept up to date.
Info: If you require further assistance setting up your emails then why not consider our KickStart service. For more information please contact our Sales team on 0345 363 3632.
Setting up email on iPhone or iPad. (All models)

Next, scroll down the screen until you find Accounts & Passwords and select this.
On the Accounts & Passwords menu, select Add Account.

From the account types select the option ‘Other’.

Select Add Mail Account.

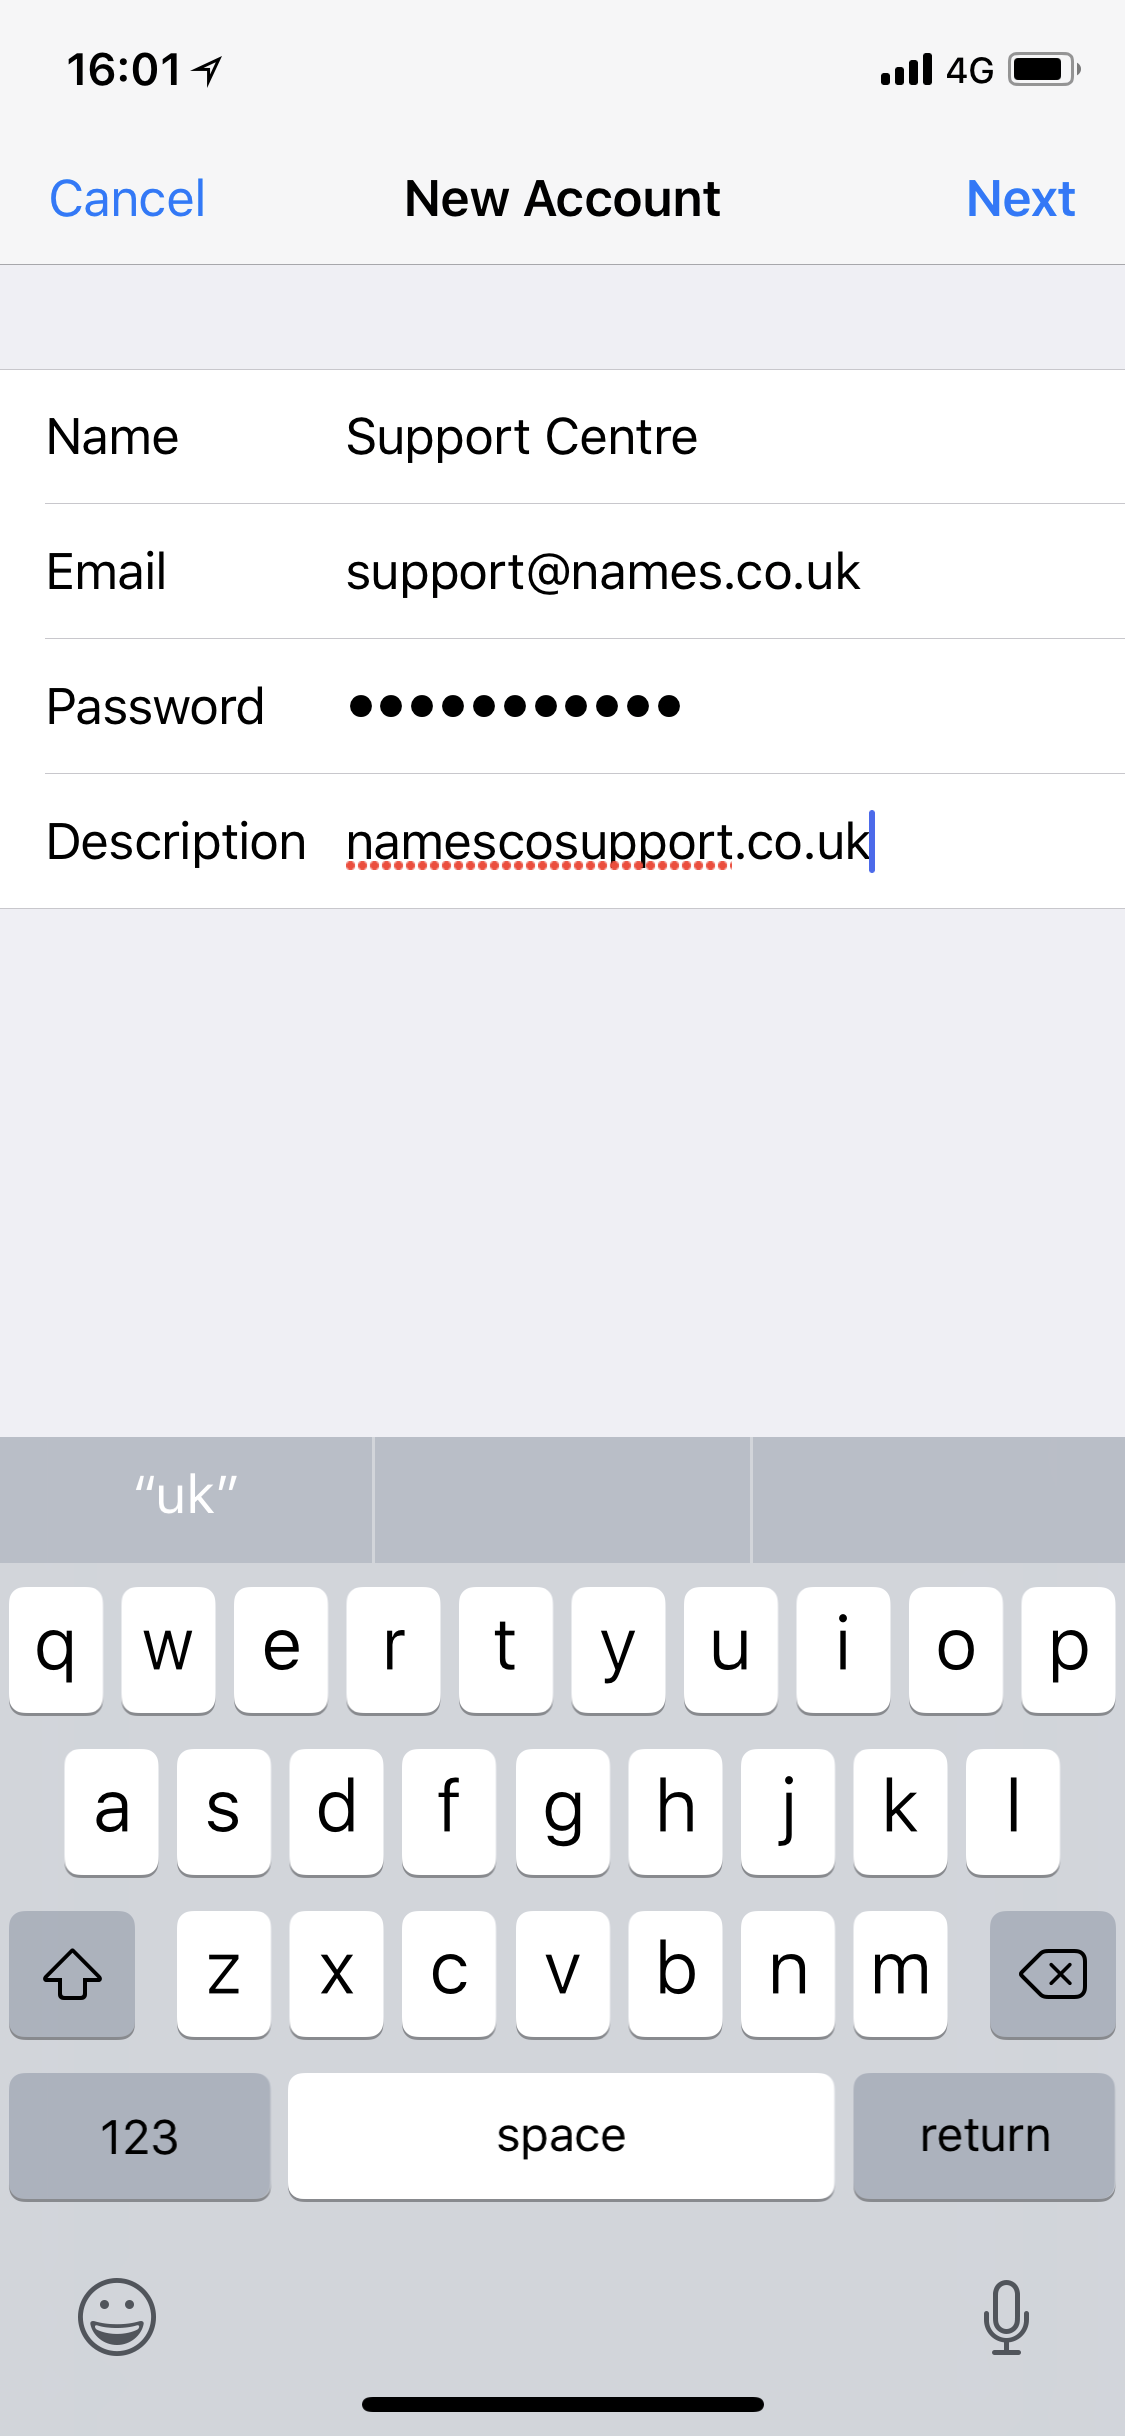
Enter your account information;
- Name – this is the name which will appear in your email recipients inbox when you send them an email, so this can be your own name or you might want to enter your company name here.
- Email – Enter the email address you want your emails to be sent from.
- Password – This should be the password you have set for your email mailbox.
- Description – This can be anything you like, it only serves to differentiate between multiple accounts you have setup on the phone/tablet.

From the top of the screen, ensure that the POP option is selected (if it’s blue, it’s selected).

Enter your incoming server details;
- Host Name – this should be set to pop3.hosts.co.uk
- Username – This will be your mailbox username.
- Password – This should already be filled in from when you entered it on the previous screen but you can update it here if you need to.
Enter the outgoing server information;
- Host Name – If you have our Authenticated SMTP enter smtp.hosts.co.uk
- Username – Enter the domain name these emails are to be sent from
- Password – Enter the Authenticated SMTP password.
Press next in the top right of the screen and the account should then be ready to use.