How to Enable Varnish Cache for WePanel
In this guide, we will show you how to enable Varnish Cache in WePanel. Varnish Cache is a tool that makes websites load faster by saving copies of web pages and content. When someone visits a site, Varnish can quickly show them the saved version instead of asking the server to build the page again. This helps websites handle more visitors at once and makes browsing smoother.
Getting Started
To get started, you first need to log into the WePanel through your Online Control Panel. Unsure how to do so? Follow our guide HERE
Step One
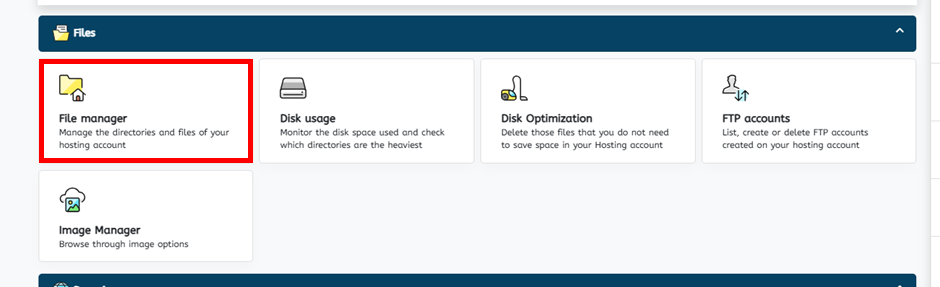
Go to the section titled Files, then select the File manager panel.
Step Two
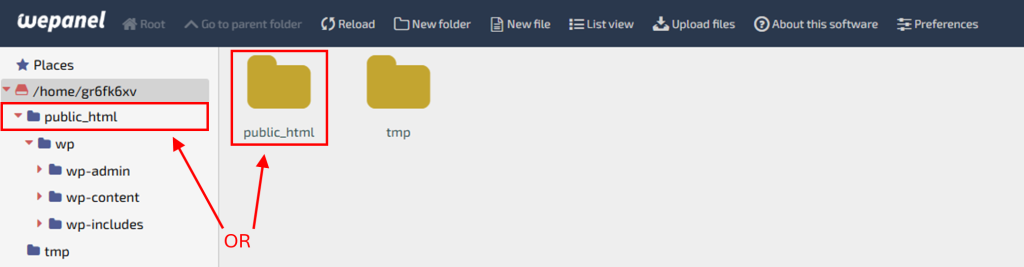
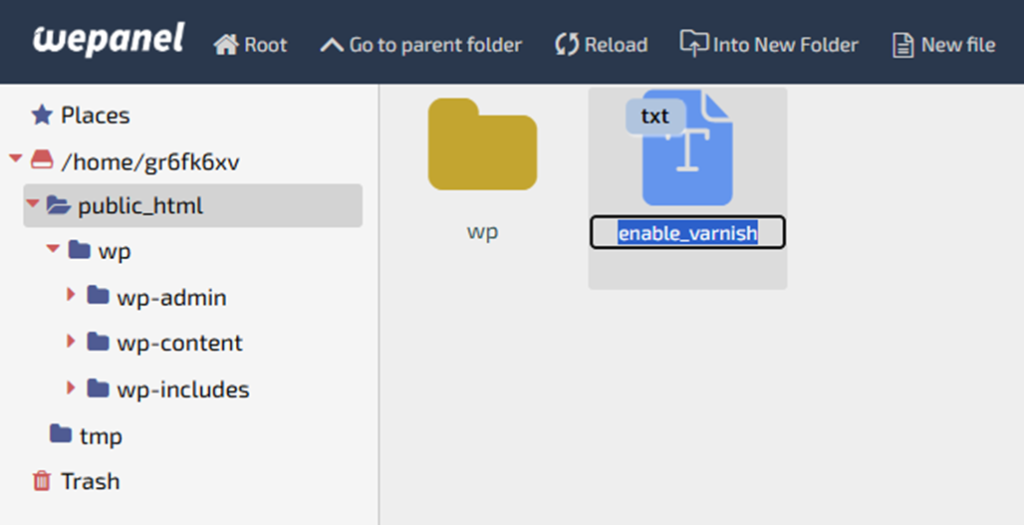
Open your public_html root directory, either by selecting the option in the menu on the left side of the page, or by selecting the public_html folder in the navigation pane on the right.
Step Three
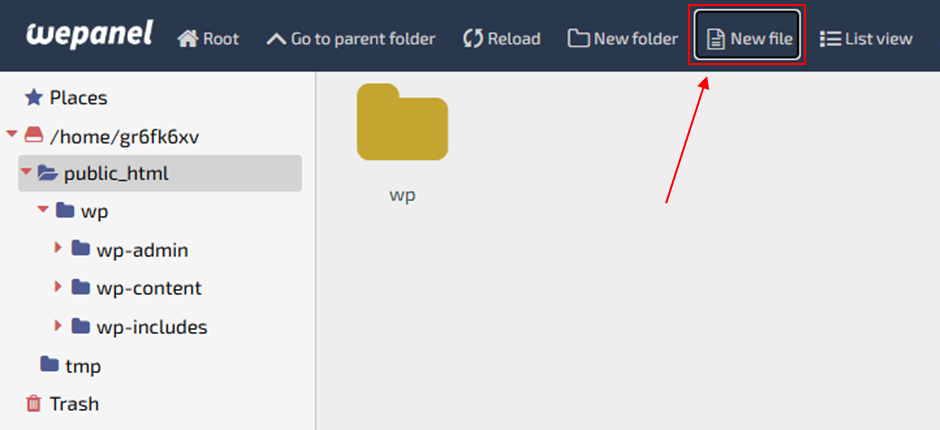
Select New File in the menu bar at the top of the screen.
Step Four
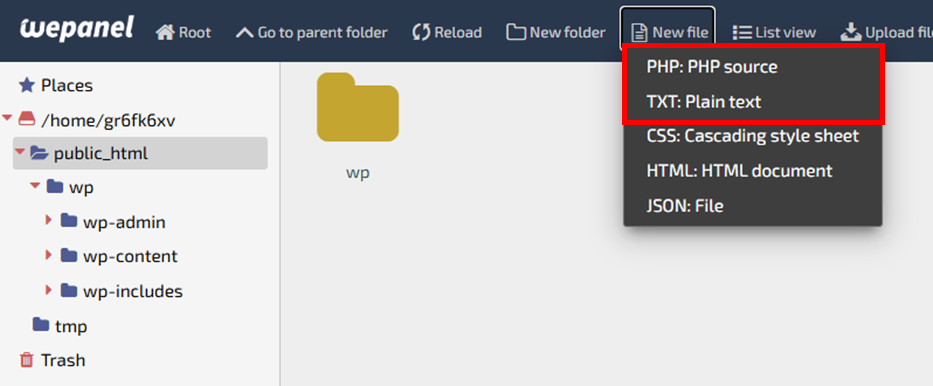
In the drop-down menu that is presented to you, select either PHP or TXT as the file type.
Step Five
With the file that has been created, replace all the text in the default title (including the file type) with enable_varnish
Once done, press Enter on your keyboard or click anywhere else in the navigation pane to finalise renaming the file, after which, Varnish Cache will now be enabled.
If you have any further questions, simply raise a support request from within your Online Control Panel or call us on 0345 363 3634. Our Support team are here to help and ready to assist you with your enquiry.
For assistance raising a support request please follow the following guide.