What is Site Admin?
You can grant sub-user access to your account by utilising the Site Admin feature. This functionality ensures that the user is restricted to managing services associated with one or more specific domains, rather than having access to your account in its entirety.
Furthermore, all sensitive account and billing information will remain strictly confidential and hidden from their view.
NOTE: The option for Two-Factor Authentication (2FA) is NOT available for Site Admin users. This option is only available for the primary Account Holder.
Getting Started
To get started, you first need to log into your Online Control Panel. Unsure how to do so? Follow our guide HERE
Step One
In your Control Panel, select the Account tab and then User Management.

Step Two
On the right side of the page, select + Add User.

Step Three
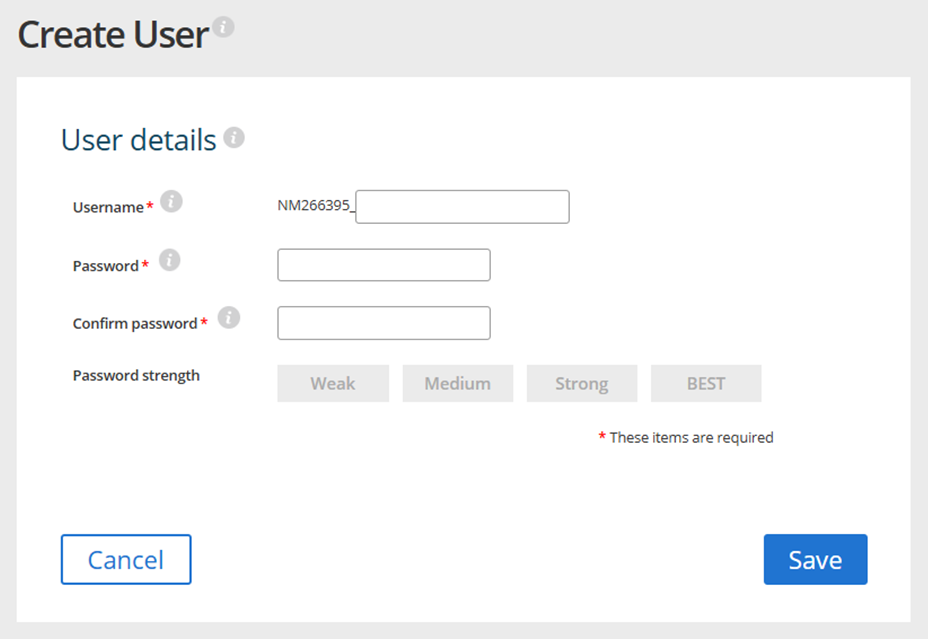
In the Create User section, create a username and password. Your password needs to be at least eight characters long. To make it secure, please include at least three of the following types of characters: a lowercase letter, an uppercase letter, a number, or a symbol.
Confirm the password in the third field, then select Save.
Step Four
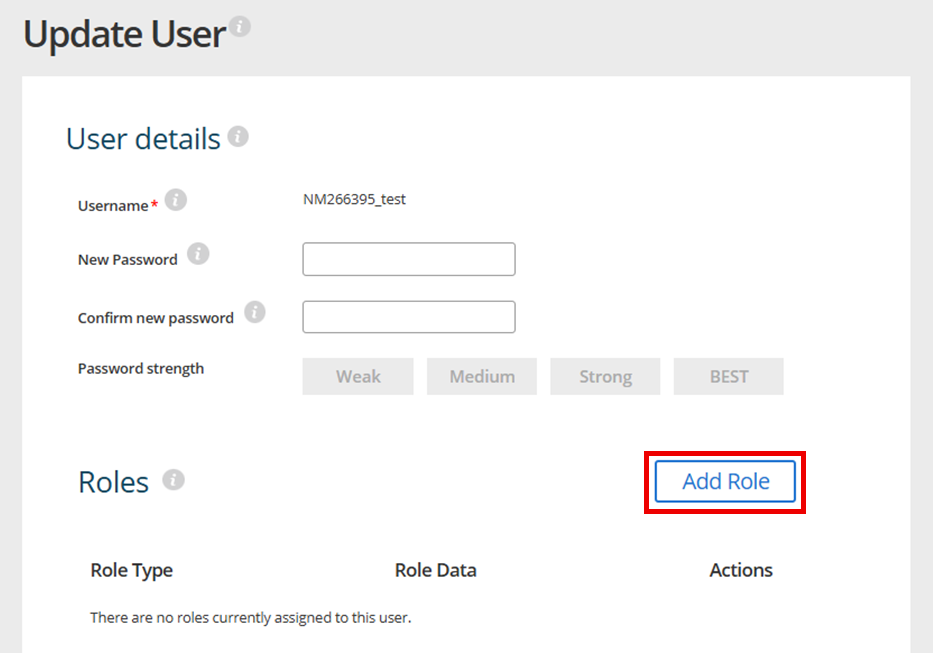
The newly created user must now be assigned Site Admin privileges, along with the specific domain(s) for which they will hold this role. To do so, please select the new user.

Step Five
On the Update User page, select Add Role.
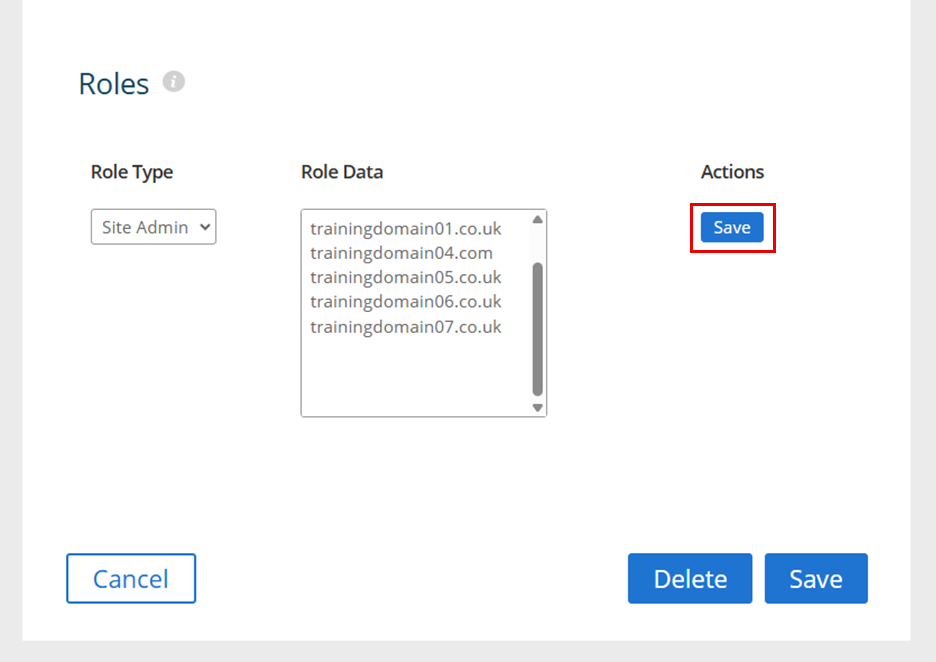
Select the domain(s) to associate the Site Admin user to, then select Save.
Step Six
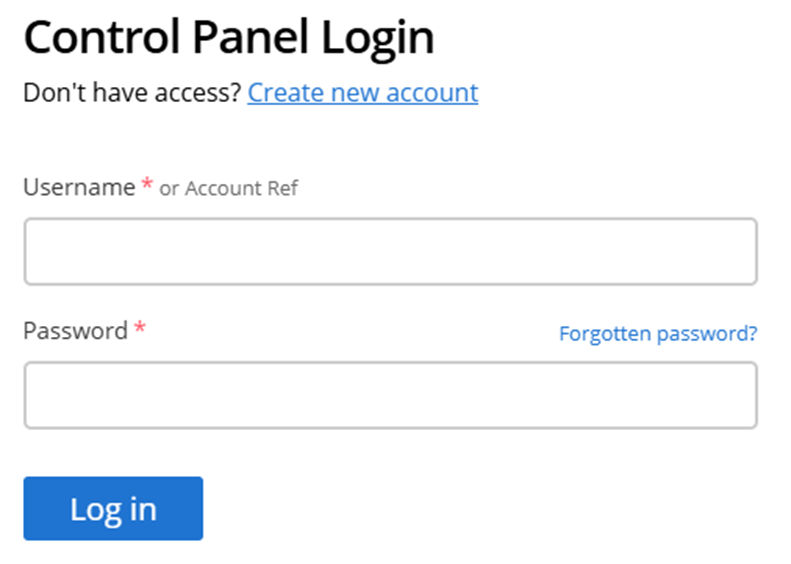
To log in as a Site Admin user, visit https://login.names.co.uk/ and type in your newly created Site Admin username and password. Once you have entered these details, select Log in.
If you have any further questions, simply raise a support request from within your Online Control Panel or call us on 0345 363 3634. Our Support team are here to help and ready to assist you with your enquiry.
For assistance raising a support request please follow the following guide.