How to set up a IMAP account in Windows Mail 2011
How to set up email within Windows Live Mail 2011 (IMAP / SMTP)
If you require further assistance setting up your emails then why not consider our new KickStarter service. For more information please contact our Sales team on 0345 363 363 2.
– Open Windows Live Mail.
– Select the Accounts tab and Click Email

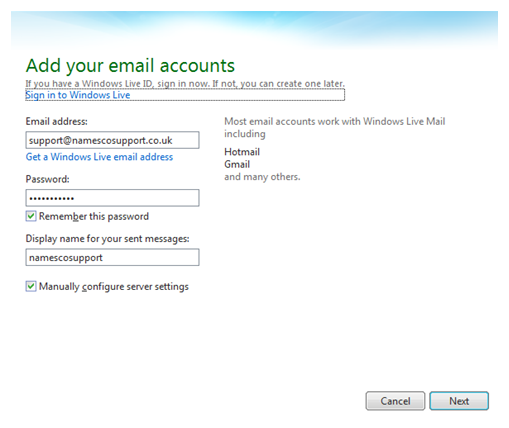
– Enter your Email Address & Password. Your Display Name will be what is displayed on your emails. Tick Manually configure server settings and Click Next (see image on right)
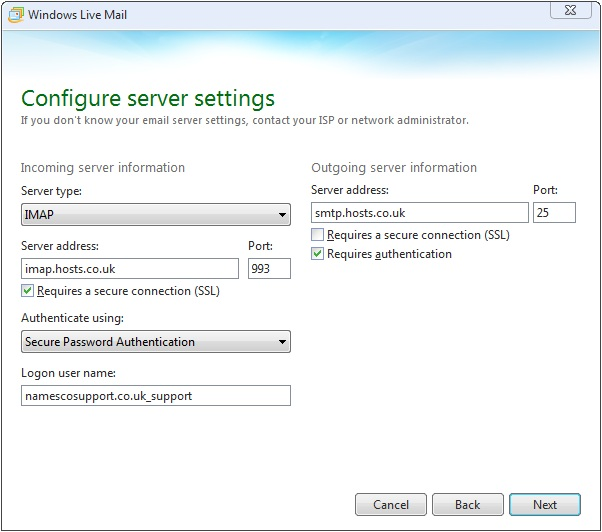
– Server Type should be defaulted to IMAP
– Server address will be imap.hosts.co.uk.
– Logon user name will be your will be the mailbox username.
– Tick the box Requires a secure connection (SSL). Set the port to 993. Click Next
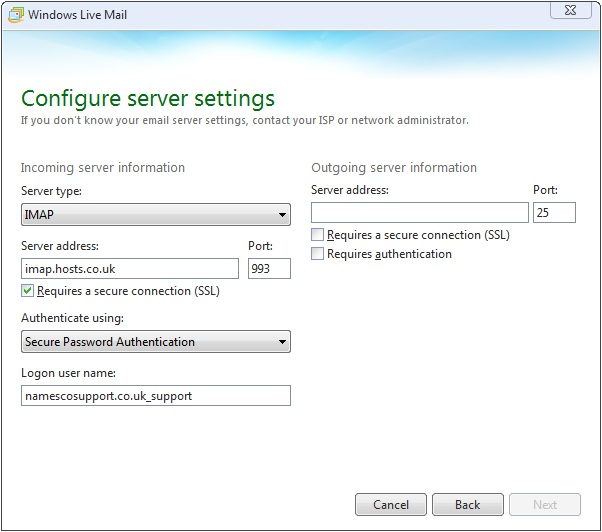
– If you have purchased Authenticated SMTP, please enter the Outgoing server as smtp.hosts.co.uk and tick the Requires Authentication box. If you have not purchased Authenticated SMTP Access, you will need to enter your internet providers details. Click Next
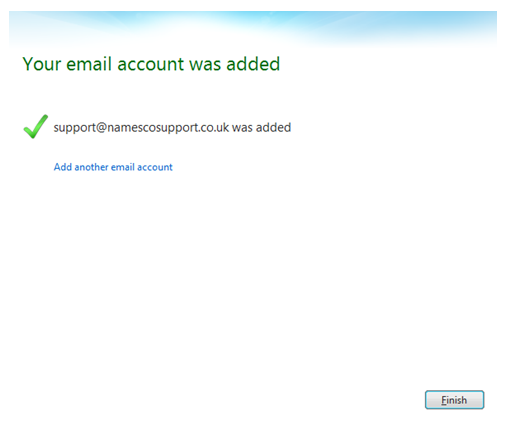
– Click Finish
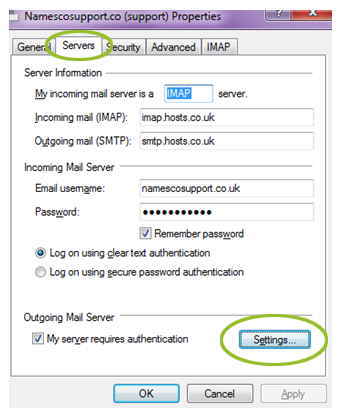
– Right click on you account name and select Properties

– Select the Servers tab and ensure your details are correct;
– Incoming Mail (IMAP): imap.hosts.co.uk
– Outgoing Mail (SMTP): smtp.hosts.co.uk (if you have Authenticated SMTP Access, if not, use your internet service providers details)
– Email Username
– Password
– Log on using clear text authentication
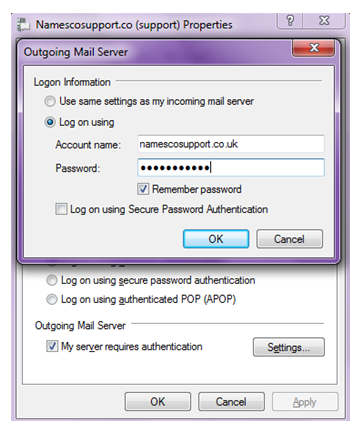
– Tick My Server requires authentication and then click Settings
]
– Select Log on using, then enter your Outgoing server details. Press Ok when you have finished