How to Enable or Disable Security Defaults for Microsoft 365
In this article, we will show you how to enable or disable Security Defaults in your Microsoft 365 Admin area. Security Defaults in Microsoft 365 are pre-configured settings that enhance account protection by enforcing multi-factor authentication and blocking outdated authentication methods – provide basic, effective security for all users.
Getting Started
To get started, you first need to log into your Microsoft Admin area located at https://login.microsoftonline.com/ with your Admin username and password.
TIP: Unsure where to find your Admin details? If so, please refer to our support guide HERE.
How to Enable Security Defaults
NOTE: Security Defaults are enabled by default, but if you’ve previously disabled them, you can follow the instructions below to re-enable them.
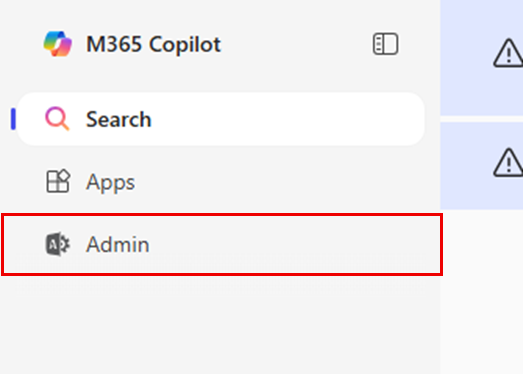
Step One
To begin, select Admin from the menu column on the left-hand side of the page.
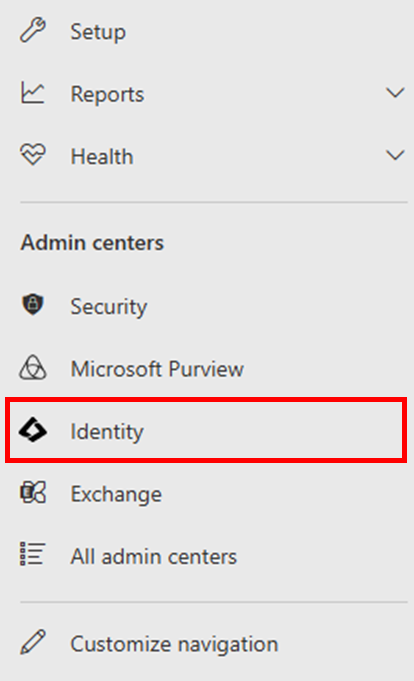
Step Two
Select Identity from the menu column on the left-hand side of the page.
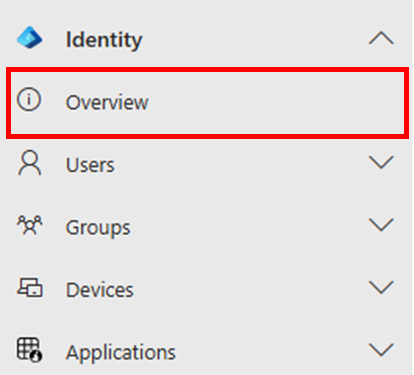
Step Three
On the page you are taken to, select Identity < Overview from the menu column on the left-hand side of the page.
Step Four
In the Overview panel, select the Properties tab.

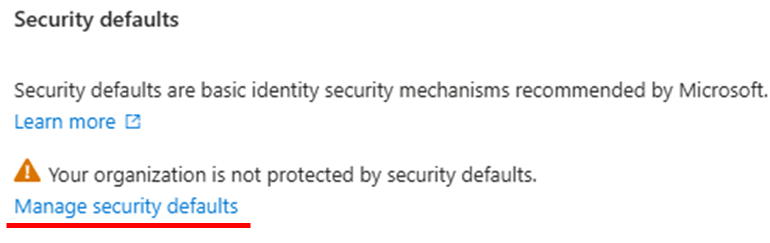
Step Five
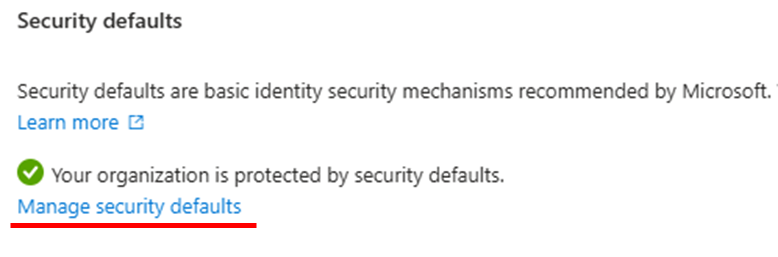
Scroll to the bottom of the Properties page to the section titled Security defaults, then select Manage security defaults.
Step Six
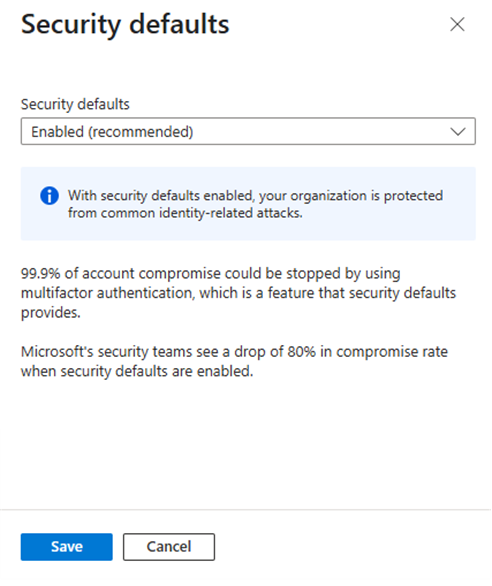
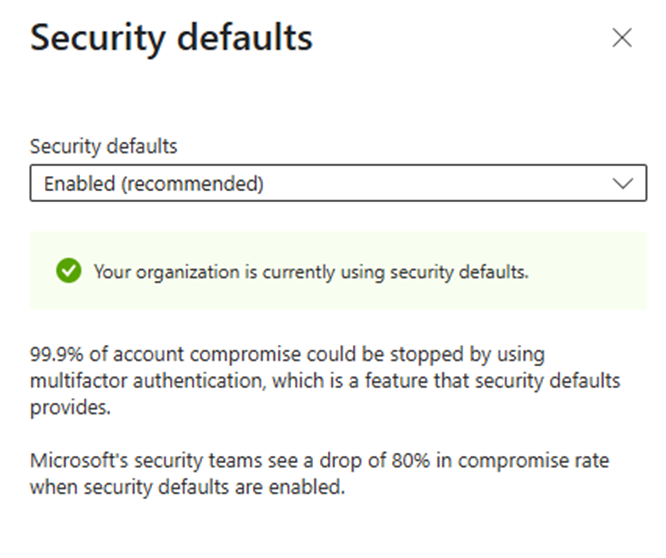
In the panel that appears on the right-hand side of the page, select the drop-down menu and select Enabled.
Confirm the changes by clicking Save at the bottom of this page.
How to Disable Security Defaults
CAUTION: We strongly recommend keeping Security Defaults enabled at all times for security purposes. Disabling it should only be a temporary action.
Step One
To begin, select Admin from the menu column on the left-hand side of the page.
Step Two
Select Identity from the menu column on the left-hand side of the page.
Step Three
On the page you are taken to, select Identity < Overview from the menu column on the left-hand side of the page.
Step Four
In the Overview panel, select the Properties tab.
Step Five
Scroll to the bottom of the Properties page to the section titled Security defaults, then select Manage security defaults.
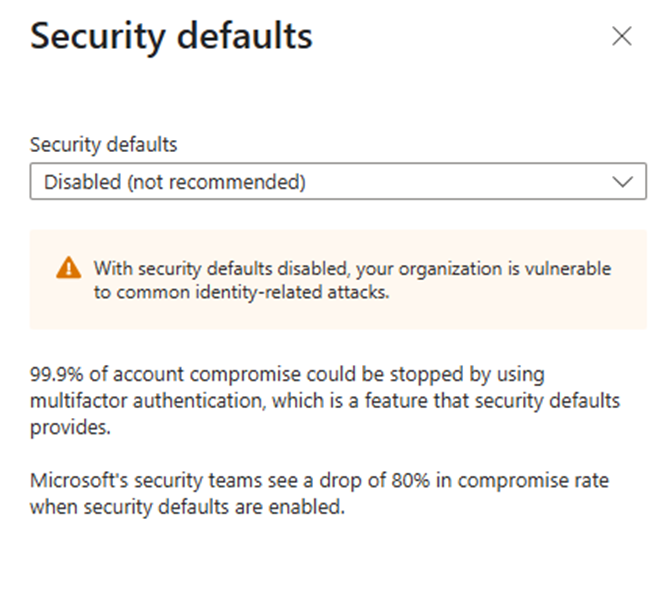
Step Six
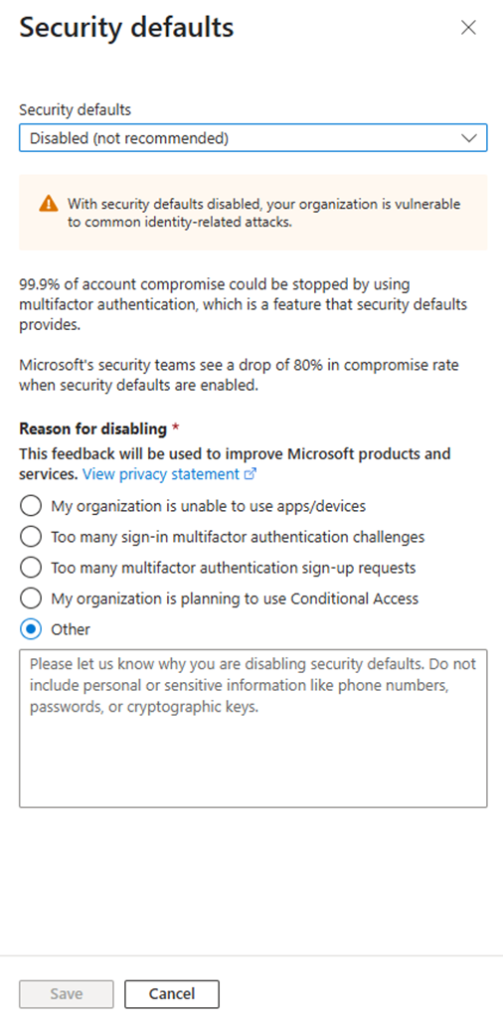
In the panel that appears on the right-hand side of the page, select the drop-down menu and select Disabled.
Once you choose Disabled, you will be required to provide a Reason for disabling. Once you have chosen one of the preset options, or if you have chosen Other and have then provided your own reason, confirm the changes by clicking Save at the bottom of this page.
If you have any further questions, simply raise a support request from within your Online Control Panel or call us on 0345 363 3634. Our Support team are here to help and ready to assist you with your enquiry.
For assistance raising a support request please follow the following guide.