Changing your domain’s DNS records
Introduction
Through your Online Control Panel, you have full access to make any needed DNS changes. To understand more about DNS please follow this guide here.
Table of Contents
- Accessing your Online Control Panel
- Finding your DNS section
- Making changes to the DNS records
- TTL and DNS history
- Updating MX records
Checking your Nameserver provider
Before making changes to your DNS settings in your Online Control Panel, it’s important to note that changes will only take effect if you are pointing to the names.co.uk Nameservers. To check where your Nameservers are held, please follow the guide here.
Step One
Navigate to our website names.co.uk
Once on the website, choose “Log in” found on the top right-hand side of the page and log into your Online Control Panel. If you need assistance with this, please follow this guide.
Step Two
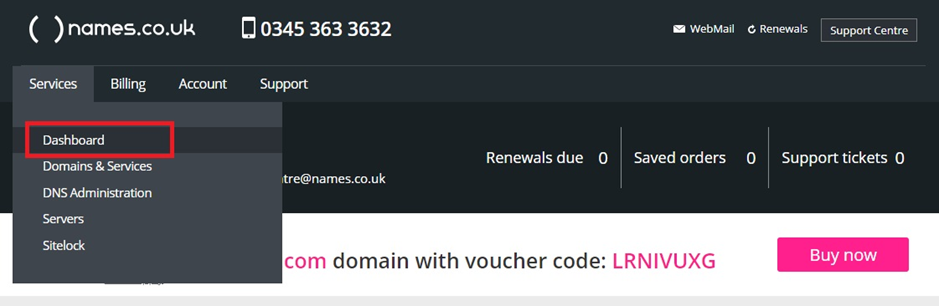
Once you have successfully logged into your Online Control Panel, navigate to the “Services” tab and from the drop-down menu choose “Dashboard”.
Step Three
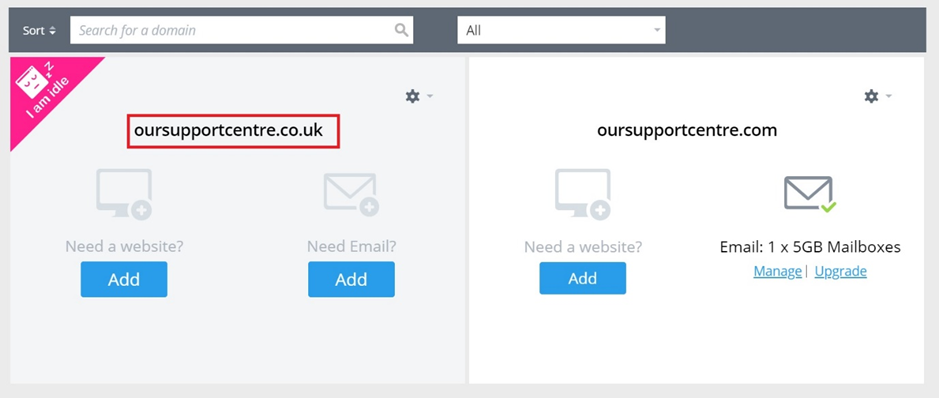
The page that loads will show a list of your domain names. Choose the domain name you are looking to make DNS changes to.
Step Four
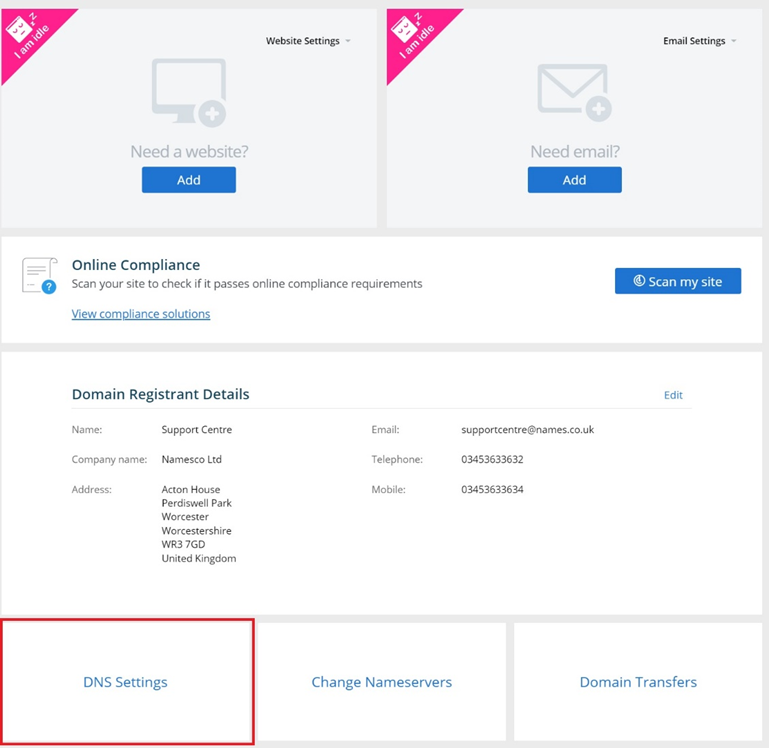
If you navigate to the bottom of the page, you will see a section called “DNS Settings” – choose this option.
Step Five
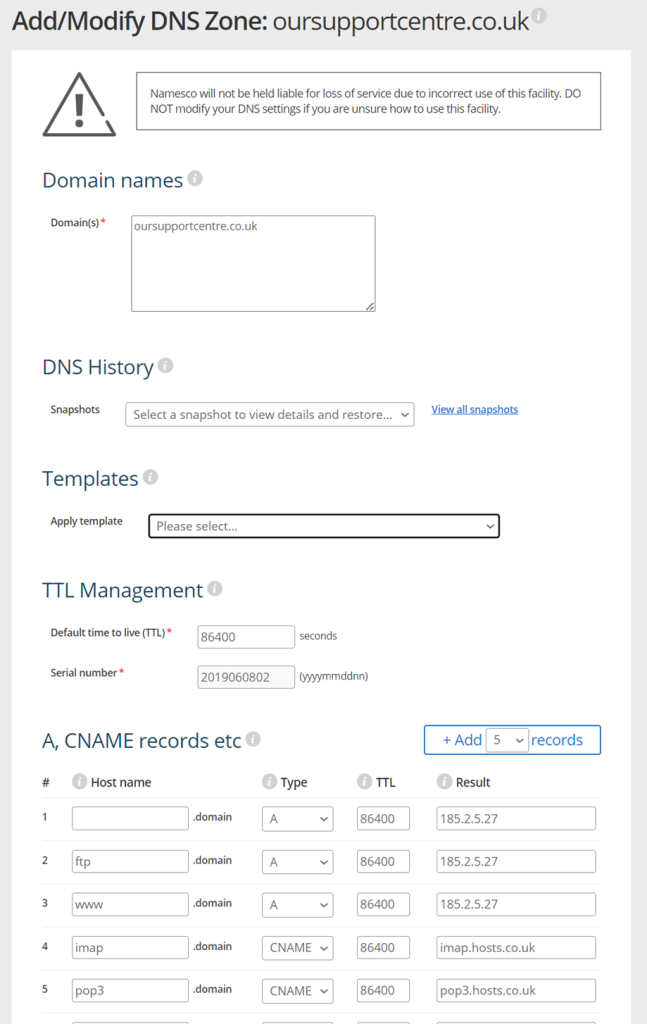
The new Page will show “Add/Modify DNS zone”. This area is broken into sections – showing the domain name firstly at the top.
The next Section “DNS History” – will show up only if the domain name has Proxy enabled. This will allow you to recover a snapshot of an old DNS entry. To enable Proxy please follow this guide here.
“Templates” is the next section on the page. There are pre setup DNS zones for the packages we offer, allowing you to easily choose a template depending on the package you currently have with us. Once selected it will populate the DNS zone with the needed records.
“TTL Management” – This is the time it takes for a change to be reflected when DNS records are amended. As standard this is set to 86400 which is 24 hours. If you had the Proxy service enabled, this can be amended to 600 seconds. Please note that overall propagation can still take 24 hours.
The Section saying “A, CNAME, records etc” is where you can enter your DNS records manually. For this you will need to have your required IP addresses or host name.
Step Six
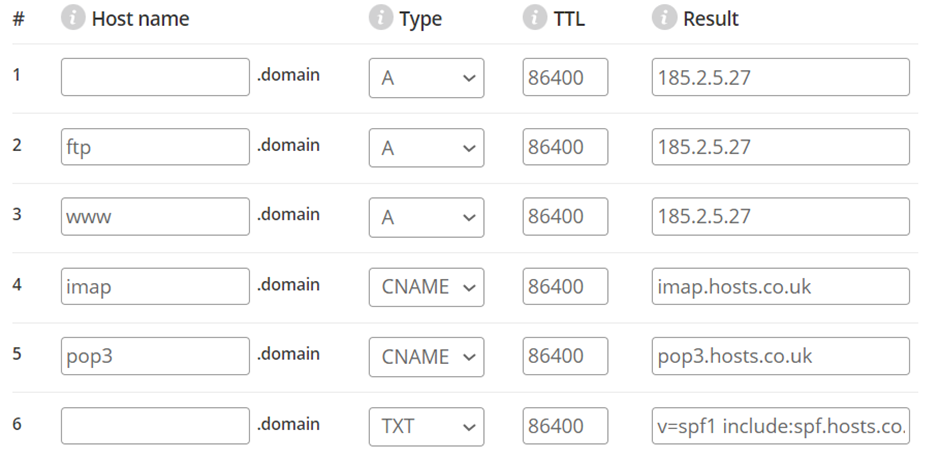
The section which allows you to manually enter your DNS records in are broken down into 4 sections:
Host name – The hostname is the prefix to the domain itself; this could be in the form of a subdomain. If you’re required to have ftp.test.com, then the hostname will be ftp, with the result being it’s assigned IP address. Note: if you’re asked to enter @ into the hostname, please leave the field blank, as our system will enter this automatically.
Type – The type depends on the type of records you are given. An “A” Record is used for an IP address. Where a “CNAME” is a host name.
TTL – Time to live. The number of seconds before a cached record is refreshed
Result – The IP address or hostname you’re pointing to
Step Seven
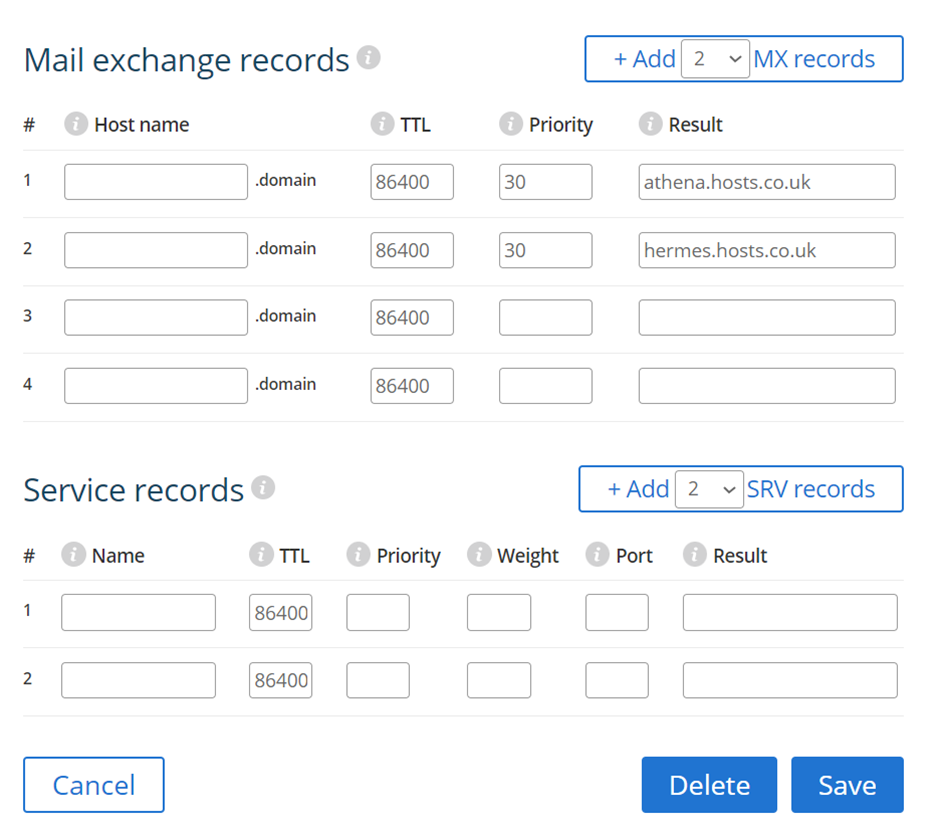
MX records (Mail Exchange Records) refer to DNS records that specify how email should be routed for a particular domain. These records determine where emails sent to users with that domain name should be delivered.
In simpler terms, they’re like signposts for email delivery, pointing messages in the right direction.
Adding MX records is similar to adding other DNS records, with the key difference being the inclusion of a “priority” field. The priority determines the order in which mail servers are used, with lower numbers indicating higher priority. Servers with lower priority values are used first, followed by those with higher values.
Step Eight
Once you have either chosen a preset DNS template or amended some existing records you need to choose the “Save” button at the bottom of the page. The changes can then take up to 24 hours or however long you have set the TTL to. As mentioned earlier you can amend the TTL if you need to make some changes quickly by activating the Domain Proxy service by following the guide here or by calling our team on 0345 363 3632.
If you have any further questions, simply raise a support request from within your Online Control Panel or call us on 0345 363 3634. Our Support team are here to help and ready to assist you with your enquiry.
For assistance raising a support request please follow the following guide.