How to create a Signature in Webmail
When composing an email, you might have a way you would like to sign the message off before sending to the recipient.
This guide will help you to create an Email Signature for sending in an email.
Before you follow this guide, you will need to be logged into Webmail. Once you are logged in, please follow this guide to create a signature.
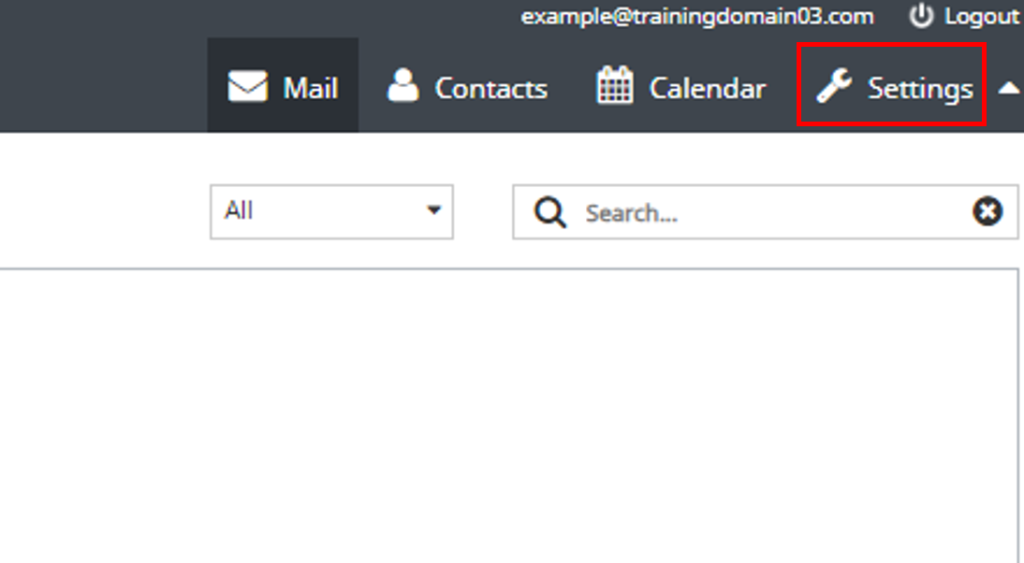
Step One
Click Settings in the top right corner of the home screen.
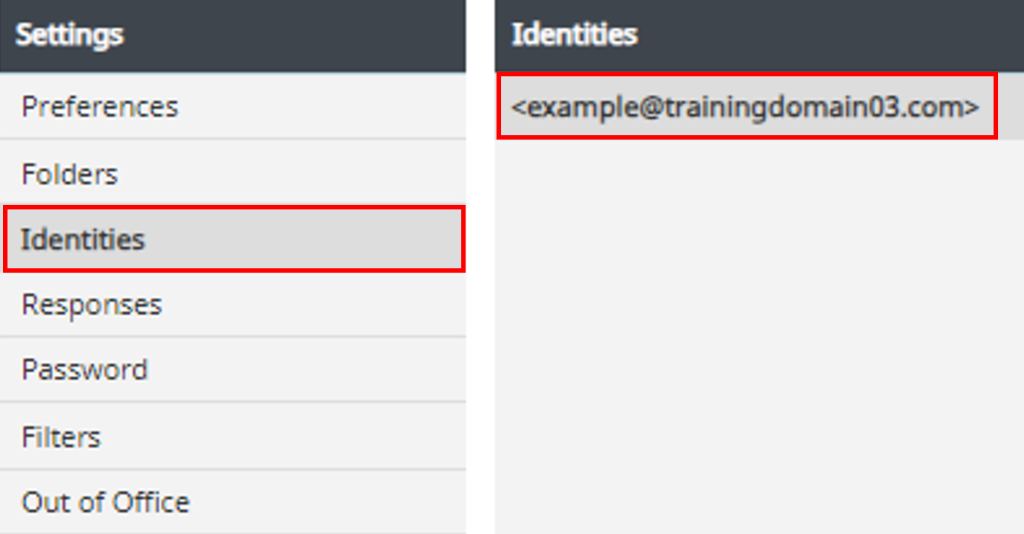
Step Two
Select Identities and then your email address you’re adding the signature to.
Step Three
Within the Edit Identities section, you will find Signature at the bottom.
Type your signature within the box that you would like at the end of your emails, as displayed in the picture below.
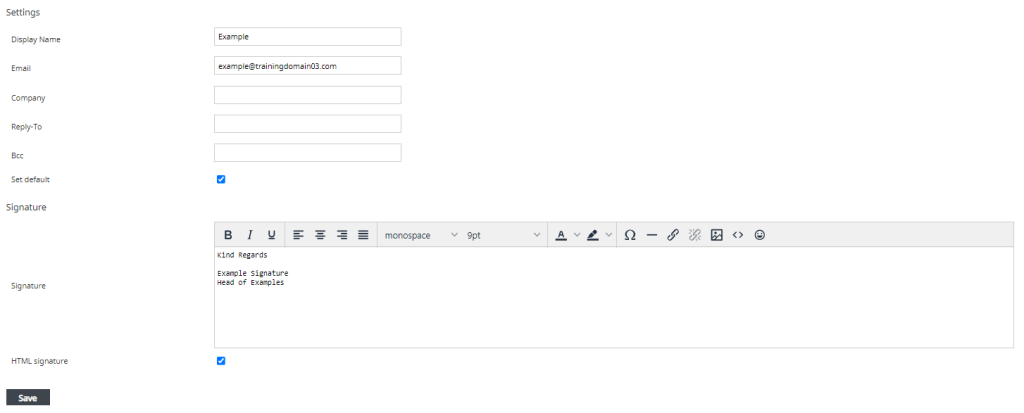
If you are wanting pictures to add to your signature, tick the box next to HTML Signature. This will ensure you can place pictures in your signature if you need.
Tick the box next to Set Default and this will set this signature to be included in any emails sent.
NOTE: This will not translate to any email client you may be using (Outlook, Thunderbird, MAC Mail etc)
Click Save and then you will have created your Email Signature.
If you have any further questions then please raise a support request from within your Online Control Panel or call us on 0345 363 3632 and our customer support team will be happy to help.