Add an FTP account in cPanel
From the ‘Files’ section of the cPanel menu, select ‘FTP Accounts’.

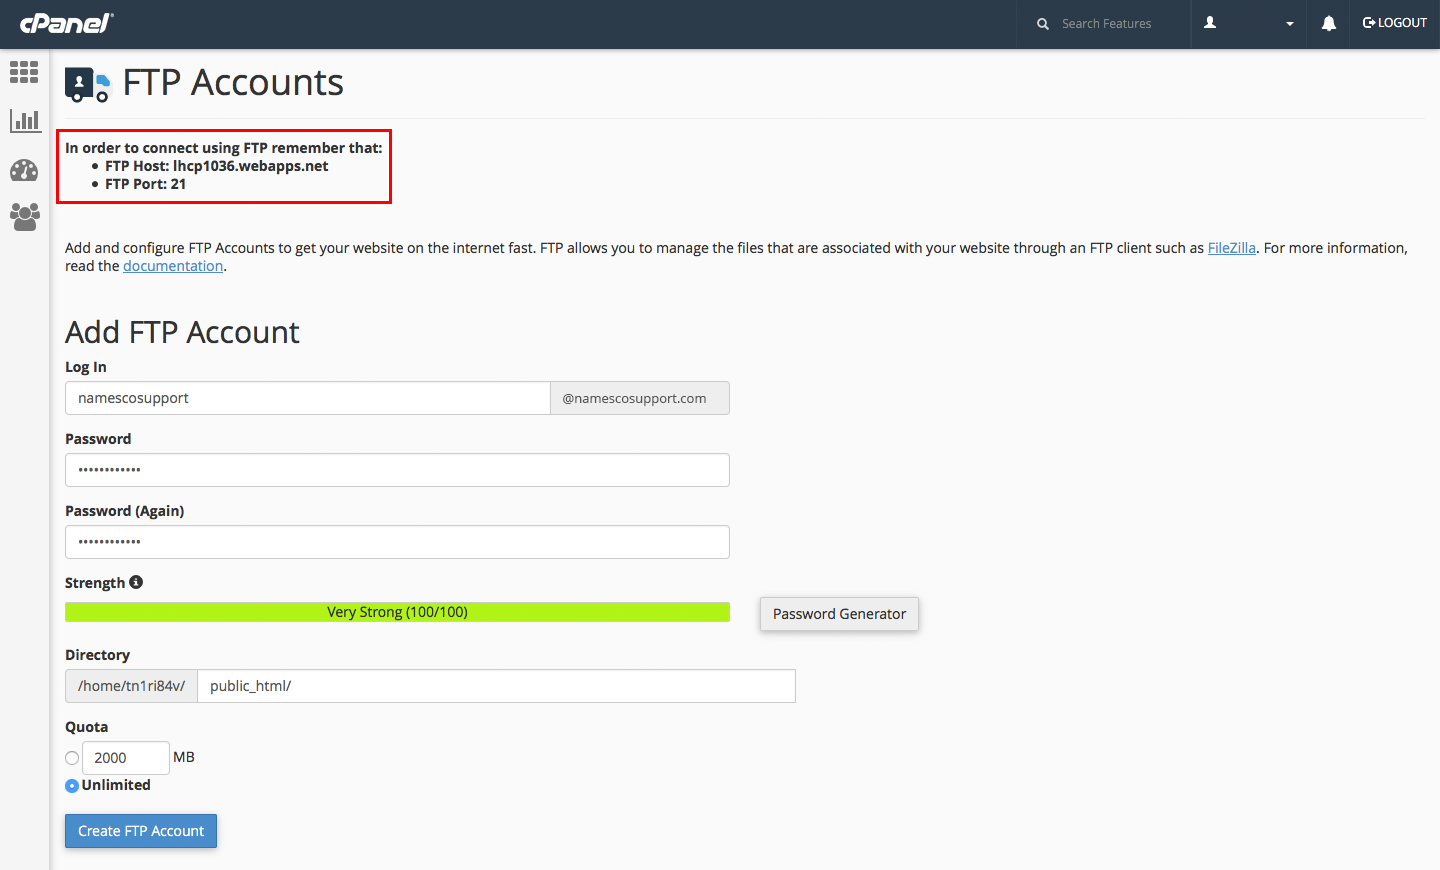
The first thing you must know is the address of the server you’ll be connecting to, this is referred to as the FTP host and though your own host might be different to that displayed on the image below, this is the location of the FTP host and where to find it in your own account. The port number is also specified and is usually port 21.
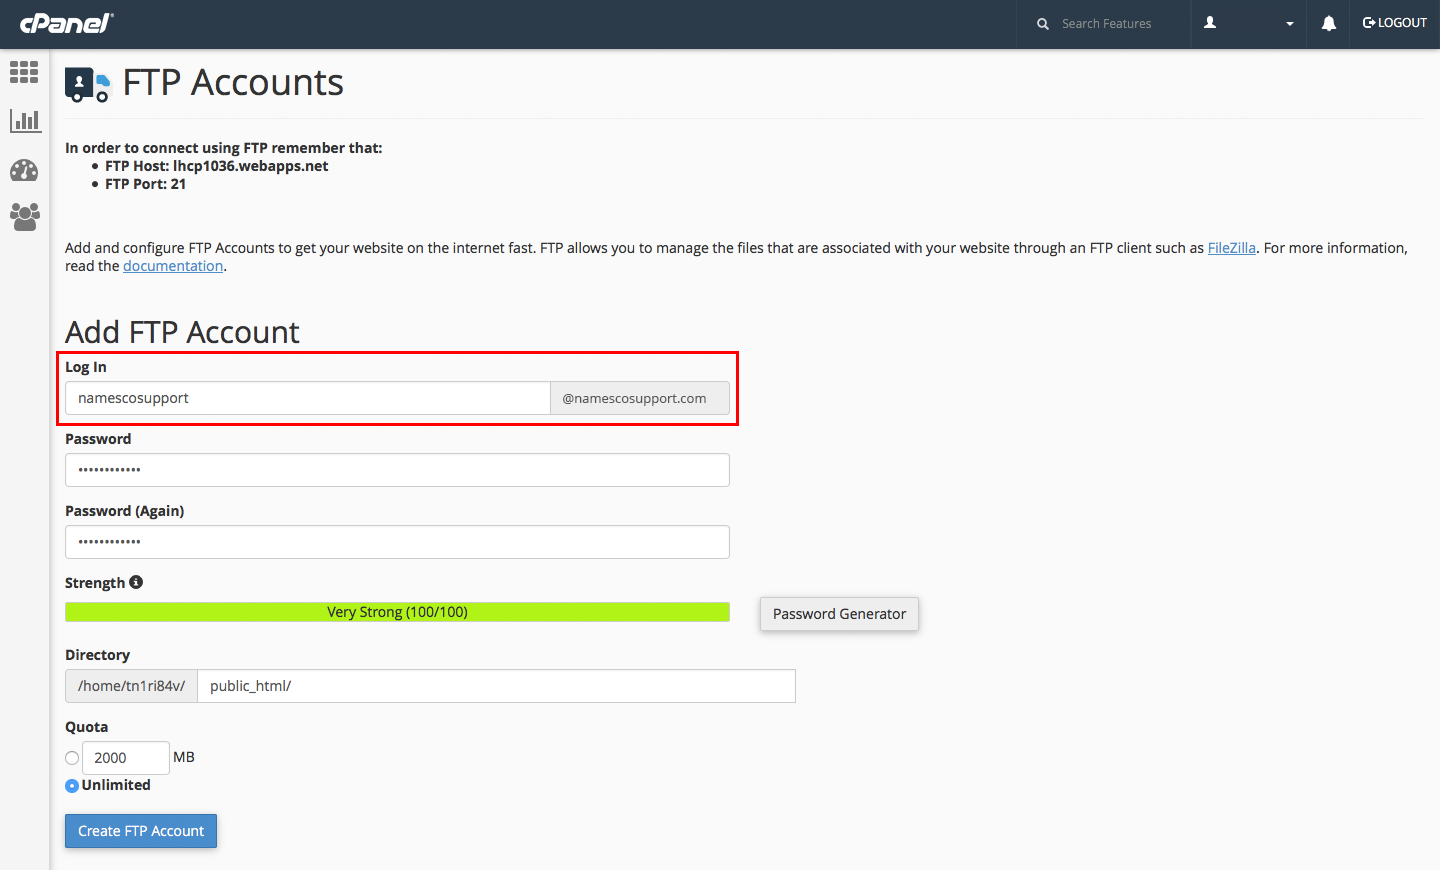
You’ll now proceed to create an FTP user, the suffix of the ‘Log in’ (or username) is already written in the right hand side and cannot be edited. This suffix is determined by the domain you are adding FTP access to. To the left of this you can type in the prefix of the username and this must be different to any other FTP usernames you have already set up.
Set your password, the password must be strong and messages on how to make your password stronger. If your attempts at creating your password do not meet the requirements of cPanel, the password will not be accepted and you’ll need again to create a password. Failing this, to the right of the password fields is a button which will generate a very strong password for you. If you use the password generator then make sure to save the password, as invariably these passwords are complicated, nonsensical and not memorable.

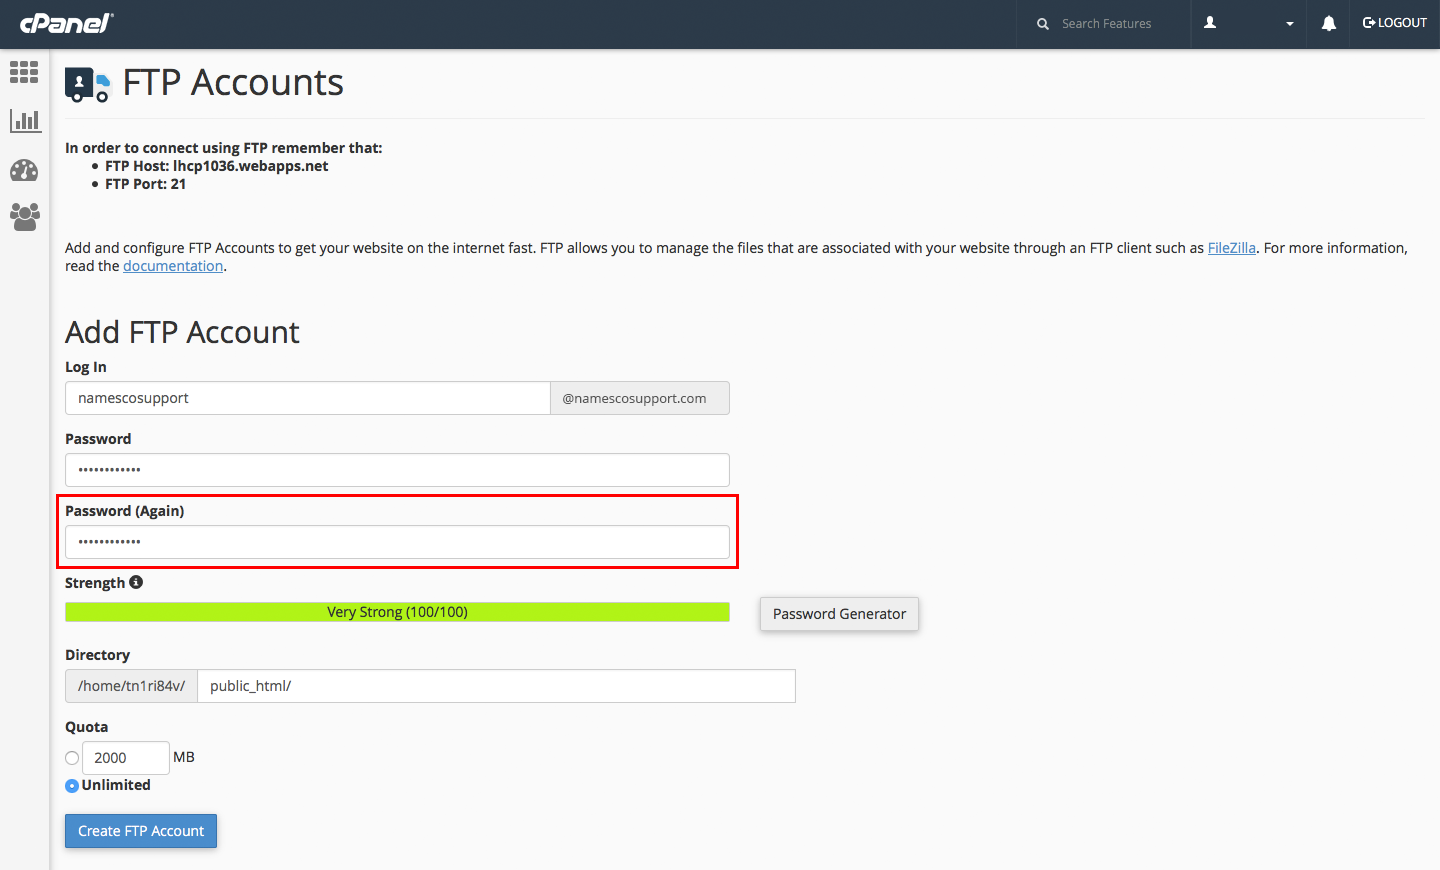
Confirm your choice of password in this next box as below, this step is not required if you use the password generator, as the confirm password field is already populated by cPanel.
You are able to limit the amount of data assigned to an FTP user, you may want to limit how much the user is able to download or upload to your hosting space. You can also assign no limits (unlimited) to a user and this is the selection by default.
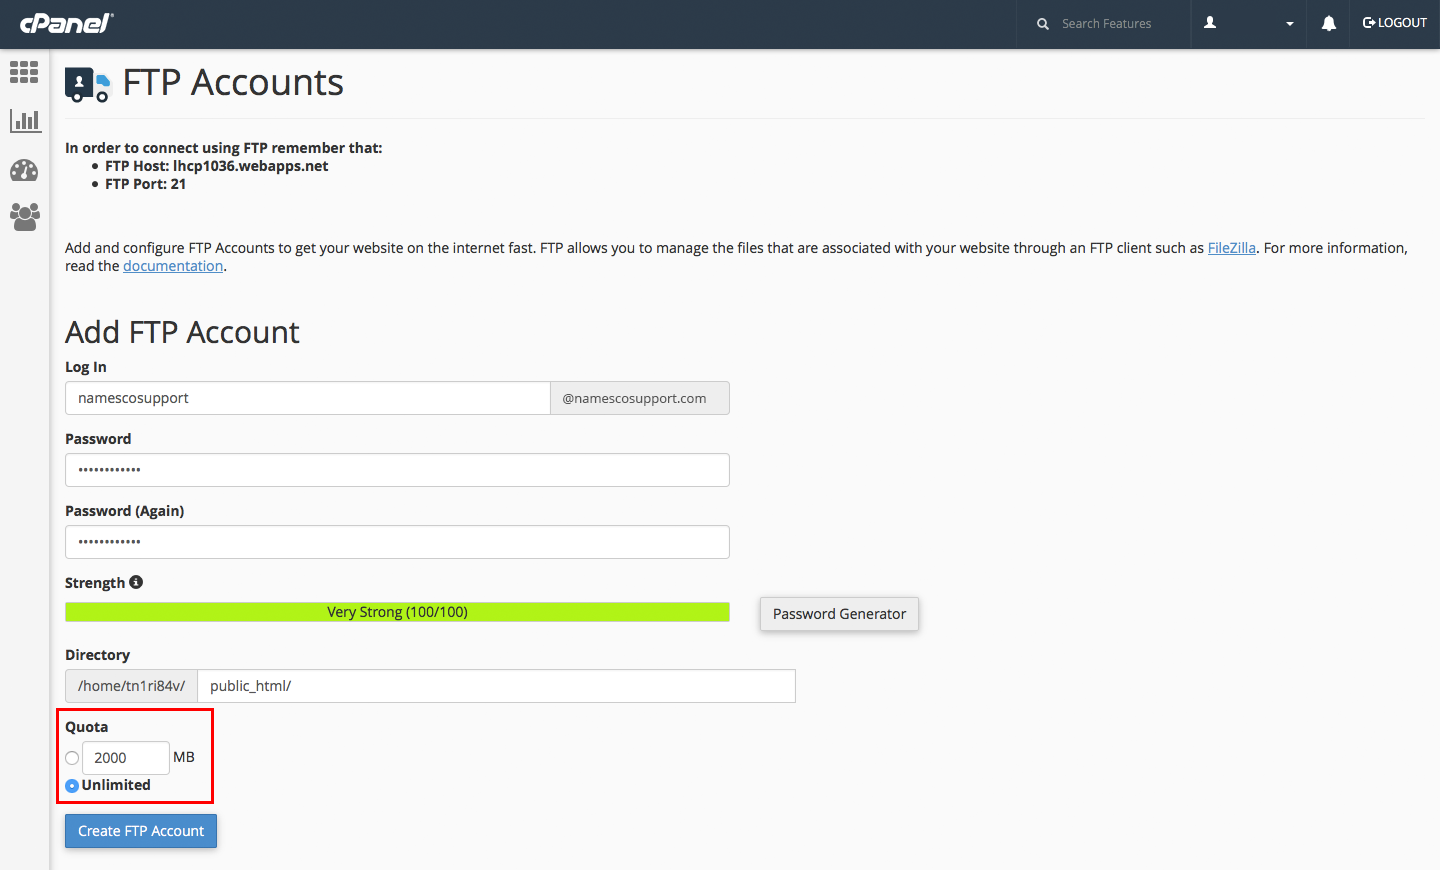
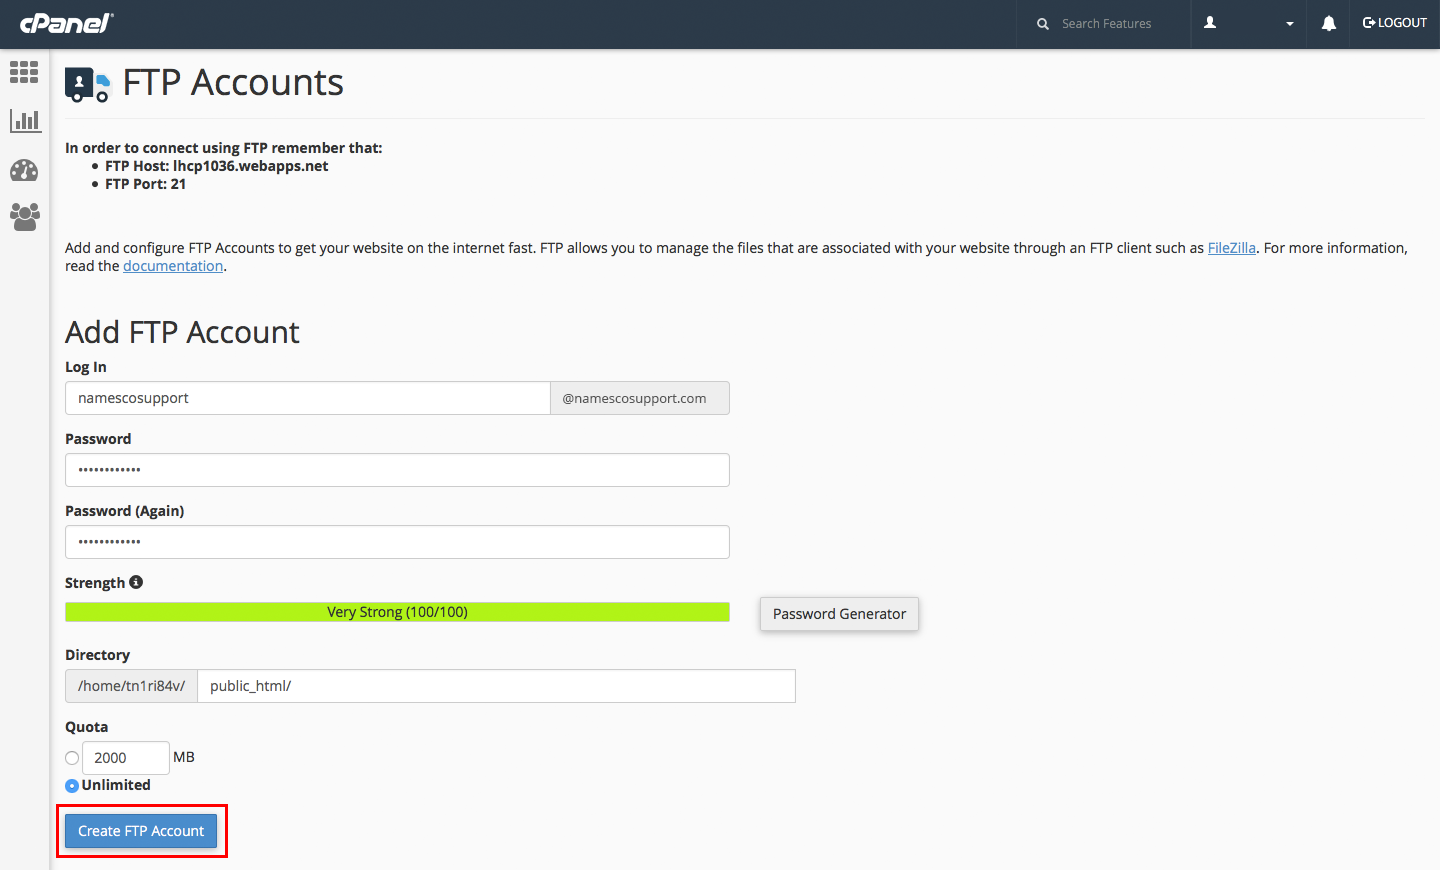
Once you have completed this form, click the ‘Create FTP Account’ button and you’re finished.