Moving Content Safely When Moving To Modern Auth (Mac Mail)
Step 1 – Backing up your mailbox
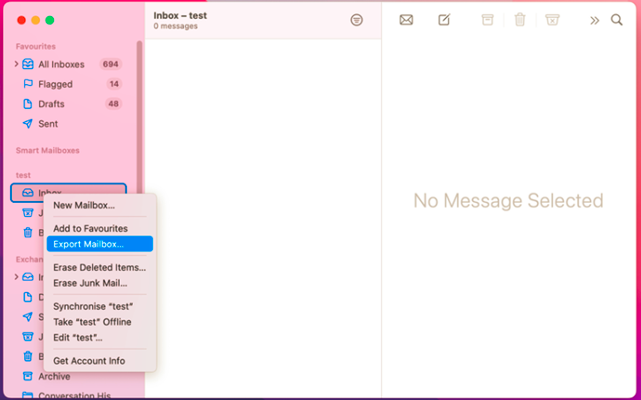
Firstly we need to ensure that the Mail application is open on your Mac. Once this is open, right click/cmd click on the inbox and click on Export Mailbox as is shown below.
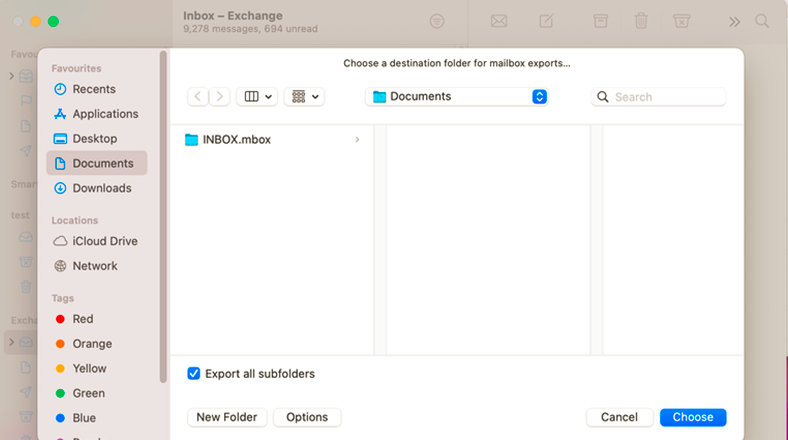
This will then take you to a screen asking you to Choose a file location. Firstly click on the Options button in the bottom left and an option for Export all subfolders will appear. Ensure that this is ticket and then click on Choose
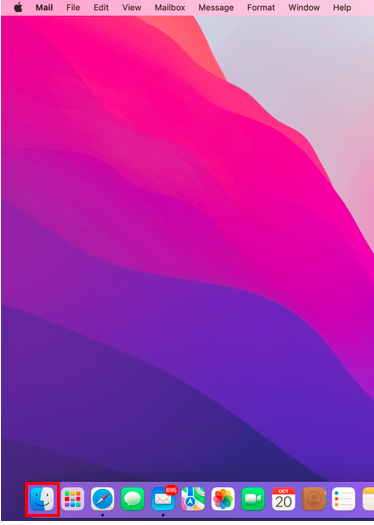
You will now need to check that the mailbox is backed up. Click on the Finder icon in the bottom left
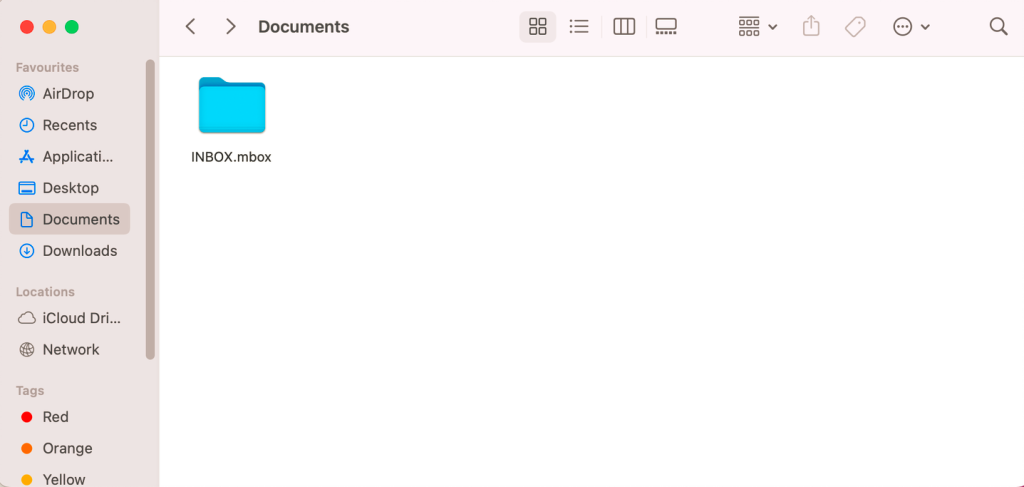
Then click on Documents on the left of the screen and you should see a file called inbox.mbox as shown below
You have now backed up your mailbox.
Step 2 – Removing your mail account
As long as you are confident that you have followed Step 1 correctly, you can now remove your mailbox from your system. In the Mail application, right click on the account you wish to remove as shown below and then click Delete Mailbox.
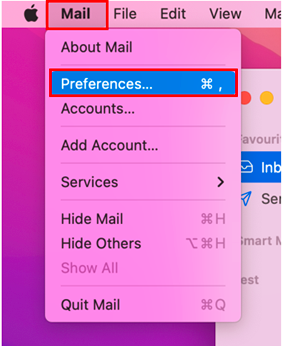
First ensure that you have the mail application open. Then click on the Mail button in the top left of the screen. Then a drop down list will appear. Click on the Preferences option that becomes visible.
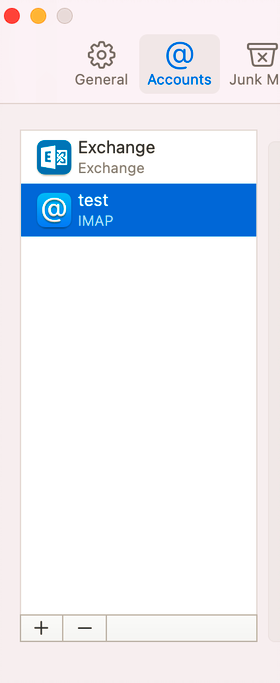
A new window will open where you can select the account that you wish to edit. Upon clicking on the account you will see that it is highlighted. Next click on the – symbol at the bottom left of the screen.
This will bring up a screen asking if you are sure you want to remove the account. Click on OK and this will remove the account and All Content
Step 3 – Adding an account with modern auth
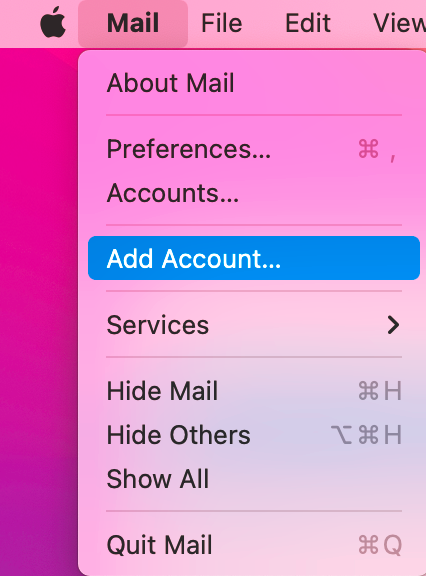
Firstly, ensure the mail application is open and click on Mail in the top left of the screen and then Add Account as shown below
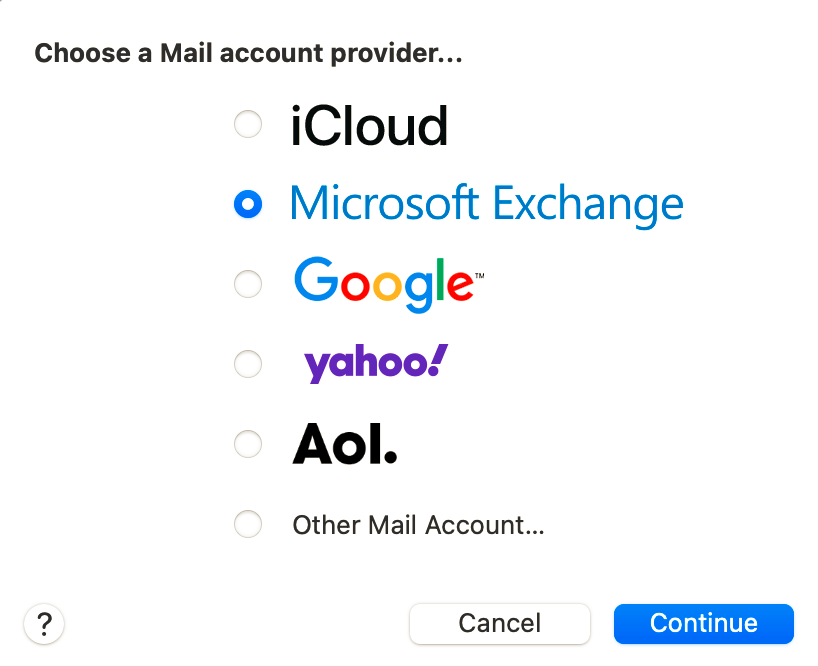
A new window will now appear within your Mail app asking you to Choose a Mail account provider. Click on Microsoft Exchange and then Continue
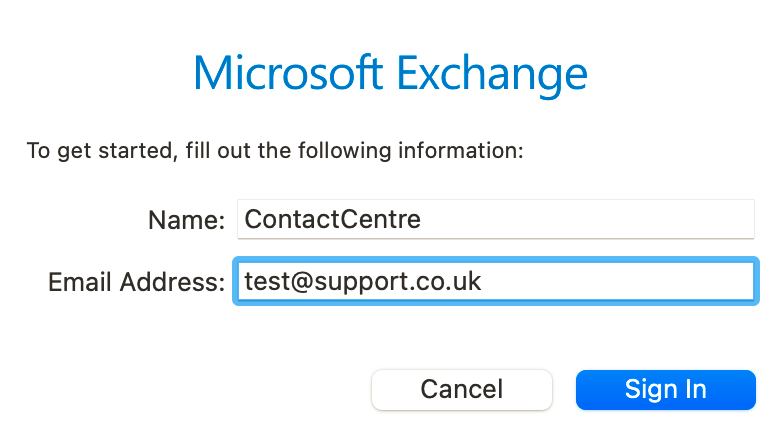
This will then prompt you to fill out your exchange account details. Enter these and hit Sign In
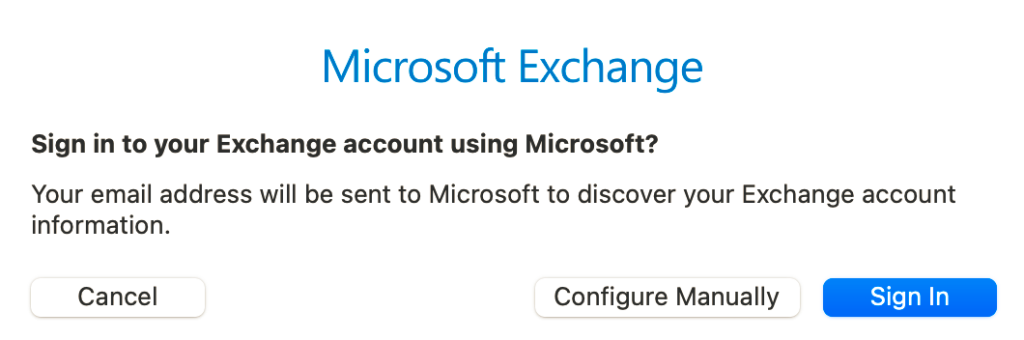
An new screen will now appear. Don’t click on Configure manually and instead hit Sign In. This step is where the account authentication is decided and clicking Configure Manually will attempt to set it up using Basic Auth which is no longer functional.
You will then be able to add your details. Once added you can then click on Done and it will add your account.
Step 4 – Re-importing Mailbox Content
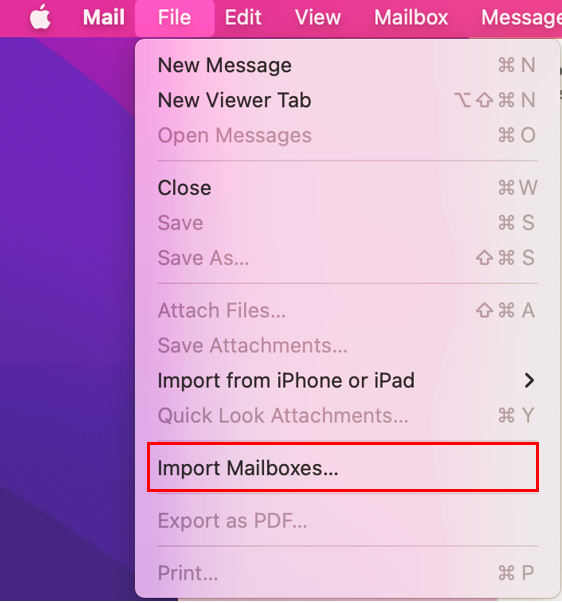
You will now need to import the mailbox back into mac mail. Firstly, ensure that the Mail app open. Then click on File and Import Mailboxes.
Upon clicking on this, the following screen will appear. Ensure that the option for Files in mbox format is selected and then click Continue.

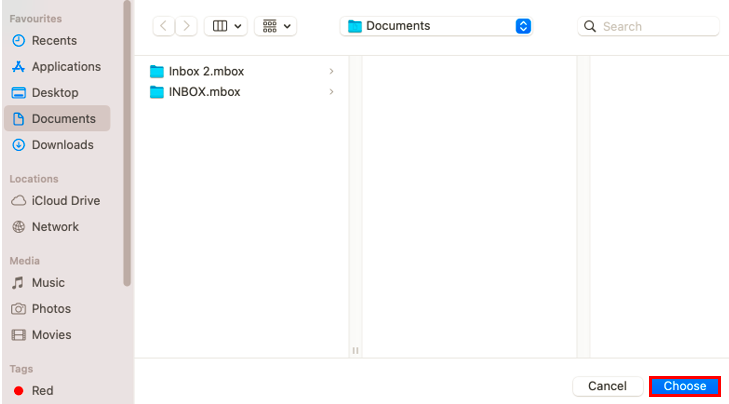
You will now be shown the file explorer screen. Select the file you wish to import into your mail client and then click Choose
After this you will be presented with a screen informing you that this has been imported then hit Done
You can now move the files within the mail application. The new mailbox will appear under Import on the left menu. You can drag the folders from here into the mailbox of your choice.