How to migrate emails from non-Microsoft 365 mail services to Microsoft 365
This article will cover the most common method of migrating existing emails from a non-Office 365 mailbox to an Office 365 mailbox. The method described will cover the use of the Connected Accounts feature within the Outlook Web App.
Using the Connected Accounts feature
The Outlook Web App interface contains a useful feature that will import emails from a standard POP3/IMAP mailbox into Office 365. This will not import any emails that are stored within folders, only the inbox, but is a straightforward and relatively user-friendly way of importing emails from the target inbox.
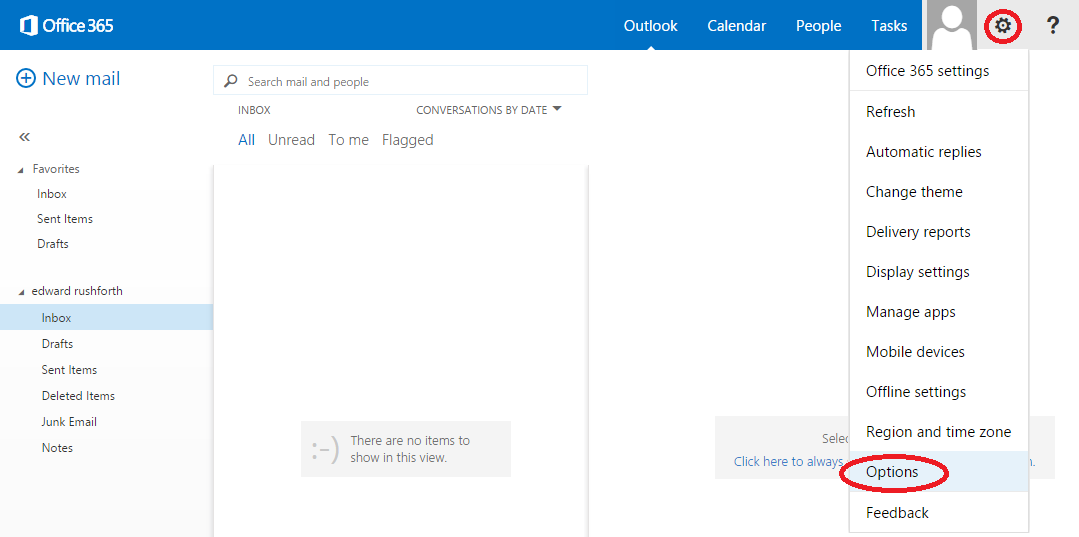
From within the Outlook Web App, click on the cog icon in the upper right corner and then choose Options.
From the Options page click on the section called Connected Accounts.
The screen this takes you to will list any non-Office 365 accounts that you may have previously have connected to your Office 365 mailbox. If this is the first time you have been here then the list will be empty, as in the below screenshot. There are icons above the list that will allow you to add, edit or delete connected accounts.
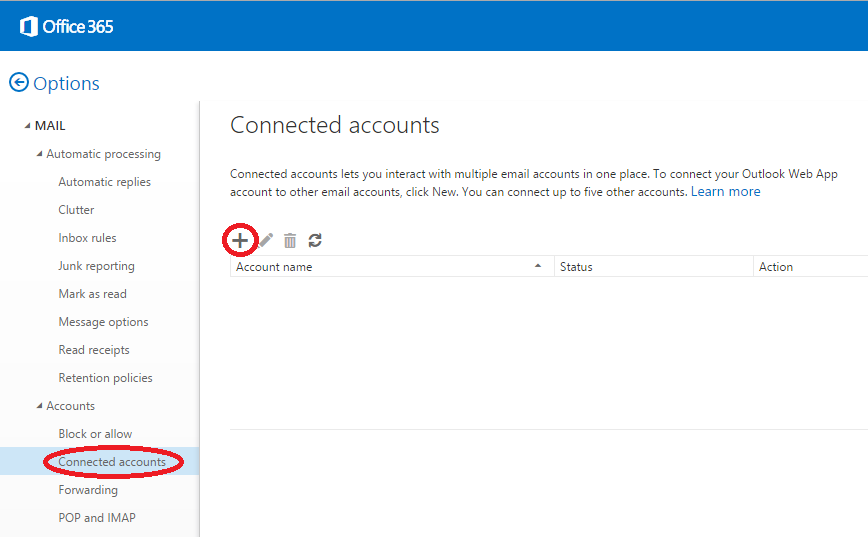
Click on the + icon to begin the process of creating a new connected account.
A pop-up window will open asking for the email address for the account that you are connecting to Office 365, and the password for it.
Note: If you do not see the window appear then please check to ensure your web browser is not blocking the use of pop-up windows.

Office 365 will now attempt to locate the server settings for the email address you have entered. If these settings can be located then the rest of the process should be seamless – however if the settings cannot be located then you will see the window shown below.
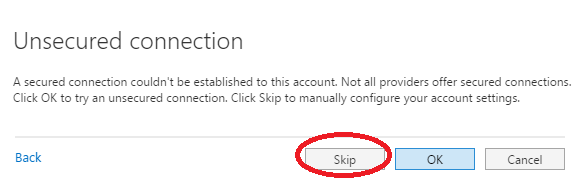
Click skip to proceed to enter the details manually.
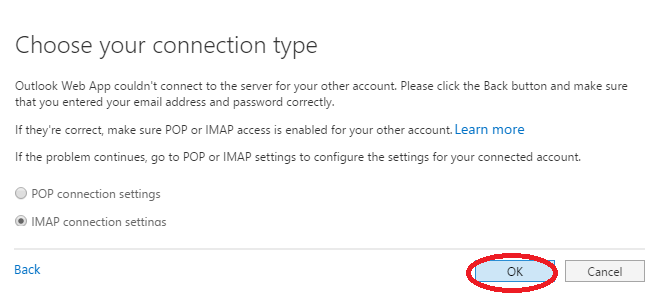
You can now click on either POP or IMAP to manually enter in the necessary connection details.
Note: You should be able to obtain the necessary details from your existing email provider.
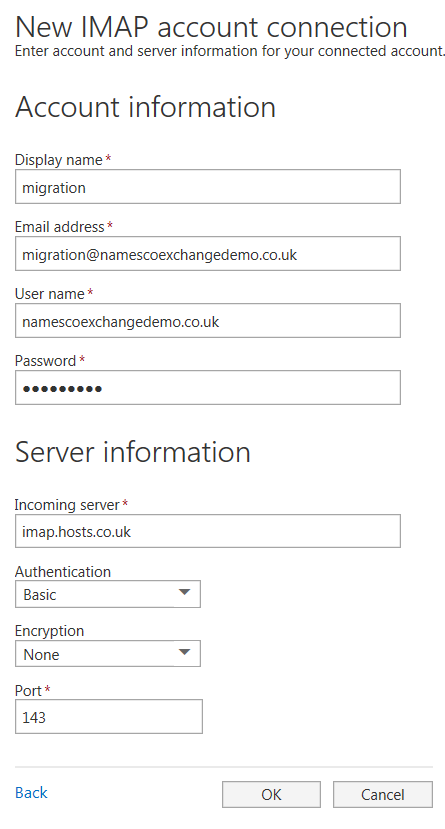
Note: If you chose the POP option then pay special attention to the Leave mail on server option (ticked by default) which will determine whether or not Office 365 leaves the emails it is migrating across in the original mailbox or not.
Once all the fields have been filled in click on OK.
You will then see the confirmation window shown below and emails from the inbox of your connected account will begin to appear in your Office 365 inbox. Depending on how many emails there are, this process could take anywhere from a few minutes to several hours.
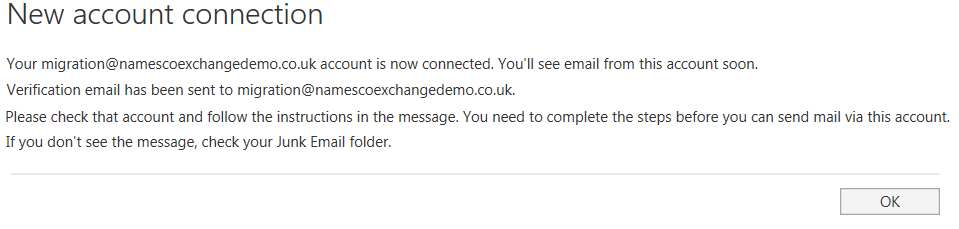
Note: The Verification Email mentioned in the above screenshot is only needed if you intend to send out emails from this connected account and is not required in order for Office 365 to import the emails. The process of sending out emails from your connected account through Office 365 is beyond the scope of this article.
Click on OK and you be returned to the Connected Accounts screen. You will now see your account appearing in the list and the Status column will inform you what the current status is of the migration process.
Note: You can click on the Refresh icon (highlighted in the screenshot below) to update the Status column with the latest information.

This completes the process of migrating existing emails using the Connected Accounts feature.