How to configure spam filtering
All Email packages from Names.co.uk come with comprehensive fully configurable spam filtering. This article will explain how to access and change these settings.
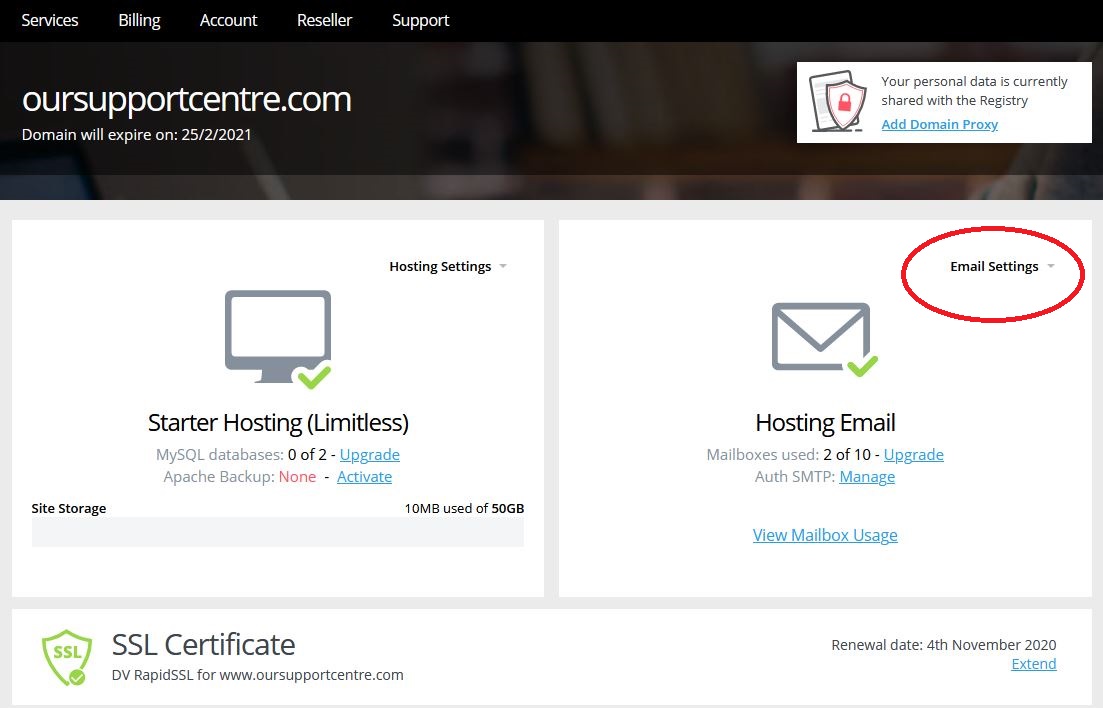
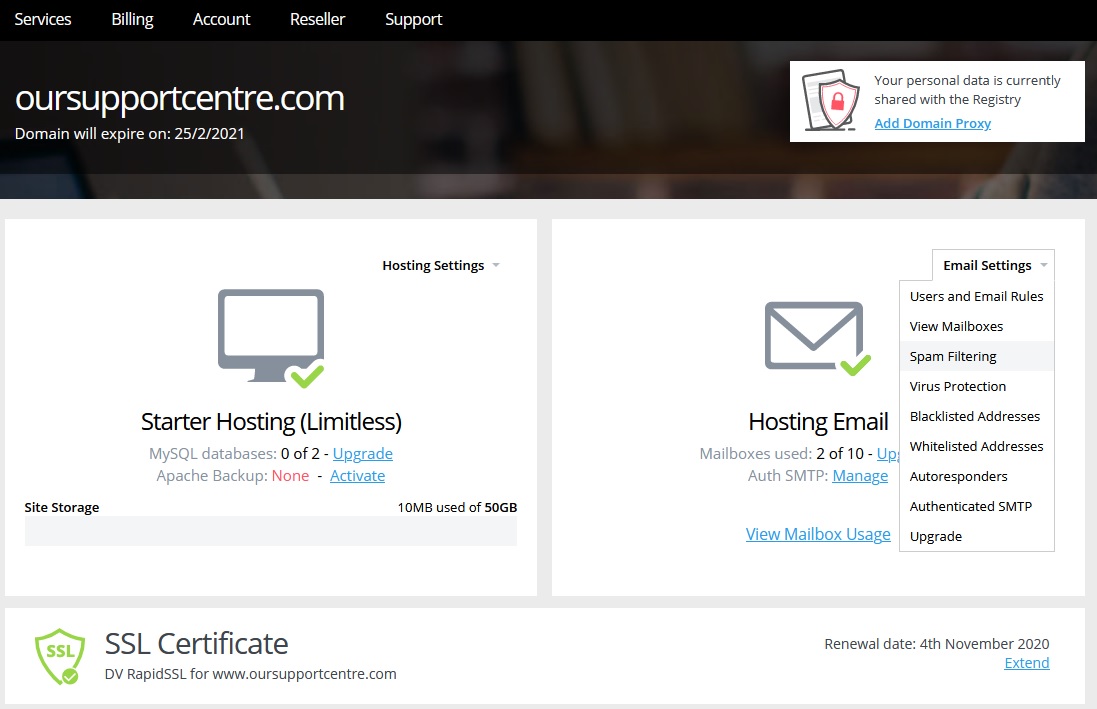
Once logged into your Control Panel, click on your domain (if you have more than one), and look for the Email Settings drop-down menu.
Select the option Spam Filtering.
By default, all mailboxes have the spam filtering enabled and configured with the recommended level of sensitivity.
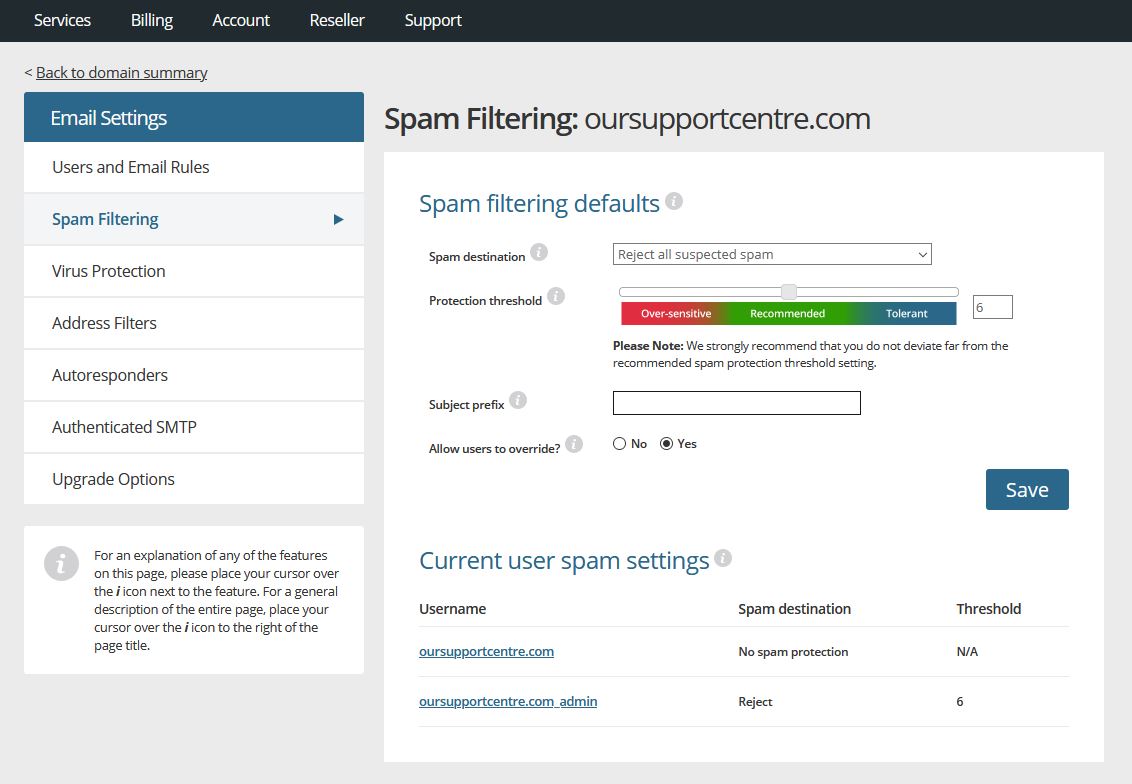
The first option on the page is a drop-down menu, which allows you to control what the spam filtering will do with emails that are detected as spam.
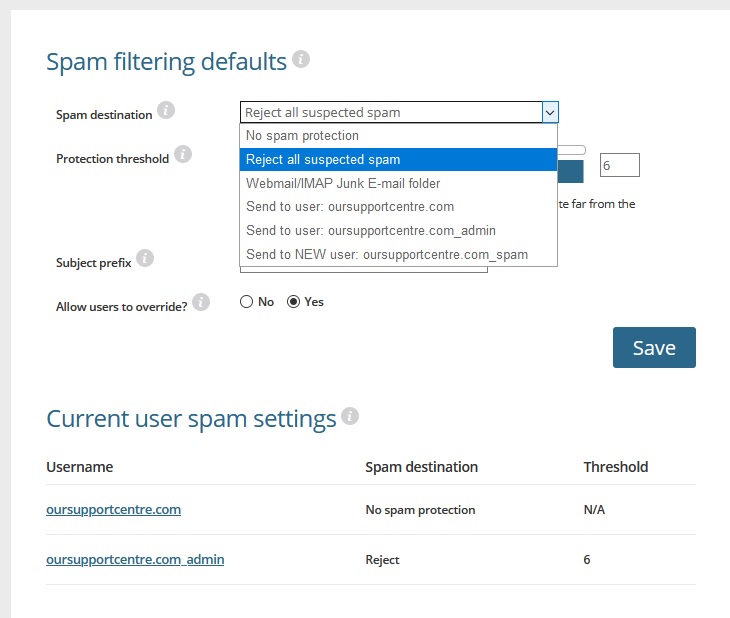
The first option is to disable the spam filtering entirely. This option is NOT recommended.
The second option is to reject all suspected spam emails, so they will not be delivered to you at all.
The third option allows you to set spam emails to be delivered to your Webmail Junk folder instead. This can sometimes be a sensible solution, as it will avoid losing any genuine emails that might have inadvertently been detected as spam and deleted.
The final options on the drop-down menu allow you to deliver all spam emails to one of your other mailboxes (if you have any), or to a brand-new mailbox just used for this purpose.
Next is the protection threshold slider bar.

The default level should be sufficient for most people, but if you find you are still getting a lot of spam emails you can move the slider bar to the left of the screen to make the filtering more aggressive. You need to exercise caution when doing this, as you run the risk of the spam filtering marking genuine emails as spam.
As a general guide, when the slider is on the Recommended setting then if the spam filtering thinks an email is spam but isn’t sure, it could either deliver it as normal or treat it as spam.
When the slider is on the Over-sensitive setting, if the filtering isn’t sure whether an email is spam or not then it will treat it as spam.
Conversely, having the slider on the Tolerant setting means that in the event of any uncertainty, the email will not be treated as spam and will be delivered as normal for you to decide.
The next option on this page allows you to alter the subject of suspected spam emails. This obviously will not work if you have chosen to have spam emails deleted entirely. However, if you have set them to deliver to your Junk folder or another mailbox, then this box allows you to enter some text which will be added to the start of the subject.
The final option is whether you want your individual mailbox users to set their own spam filtering settings. If there is only you using this domain then this won’t be a concern, but if you have a number of mailboxes then you need to decide whether you want the settings you have just entered to be over-ruled by specific mailbox users. If you are unsure, our recommendation is to set this option to No.
Clicking Save will commit your spam filtering changes to the servers, although they could take a few minutes to fully update.
The second half of this page is only useful if you have multiple mailboxes, as it allows you to see whether any mailboxes are using their own spam filtering configuration.
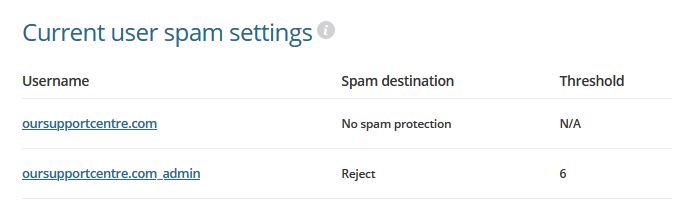
You can see here that of the two mailboxes, only one of them is actually using spam filtering. The other one has turned it off entirely. You can click on that mailbox to change the spam filtering settings that have been defined for that mailbox.
If you don’t want individual mailboxes to have their own spam filtering configuration then consider changing the “Allow users to override” option that was mentioned earlier.
This concludes our look at customising spam filtering.