How to Backup an Email Account in Outlook 2016
This guide will show you how you can backup your existing email account within Outlook 2016 by using the Import/Export tool. Please note that this guide is purely provided out of courtesy and names.co.uk does not support third-party email applications.
Let’s start by backing up your existing email account to an Outlook data file.
How to Export your email account to a data file
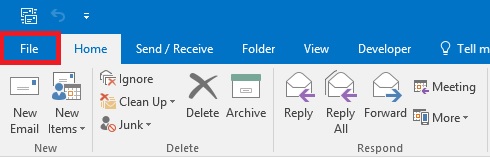
Firstly, click on File at the top left of Outlook.
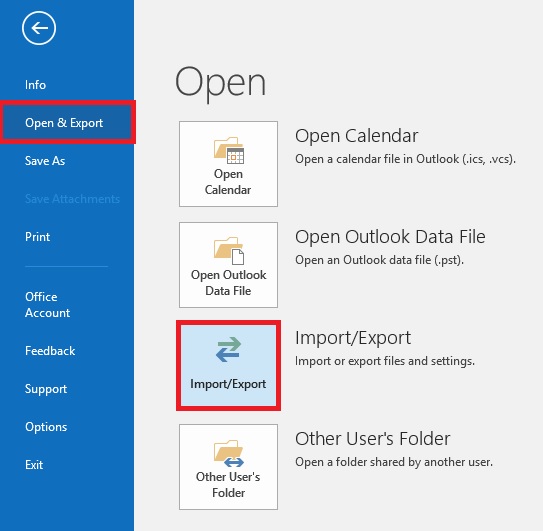
Next click on the tab Open & Export, and then click Import/Export.
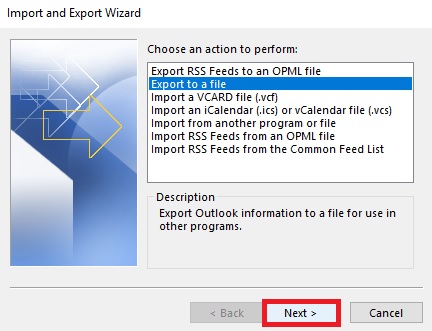
On the next window click on the option for Export to a file,
and click Next.
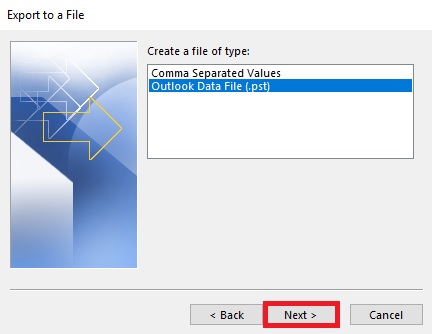
Select Outlook Data File (.pst) and click Next.
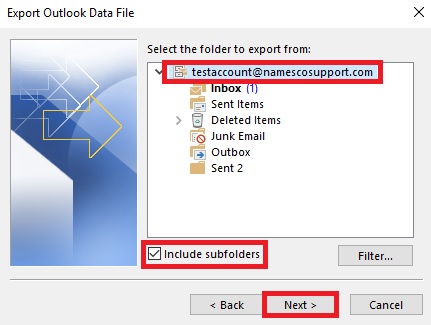
Select the folder you wish to export. In order to export the entire email account, simply select the account name itself and ensure that the box for Include Subfolders is ticked.
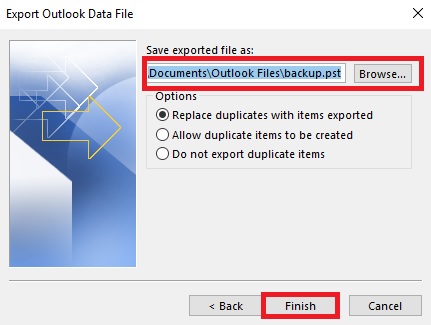
Finally choose the location of where you would like to save the data file by clicking on Browse. By default the option for Replace duplicates with items exported will be selected.
Click Finish to save your data file.
Now that you have exported the email content from the original email account, you will want to import it into the new account instead.
How to Import a data file into a new email account
Click File at the top left corner of Outlook.
Next click on the tab Open & Export, and then click Import/Export.
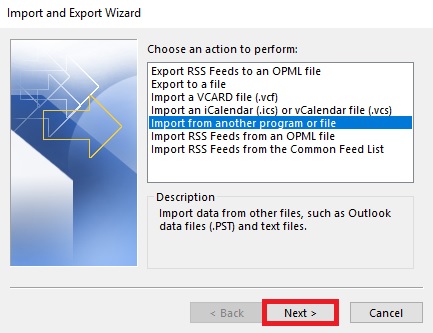
On the next window click on the option for Import from another program or file, and click Next.
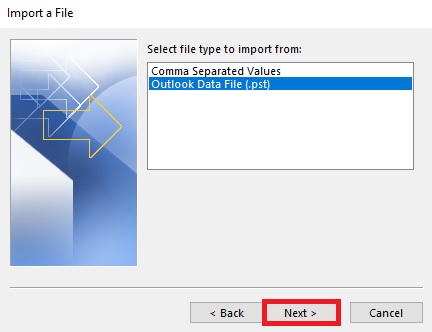
Select the option for Outlook Data File (.pst), and click Next.
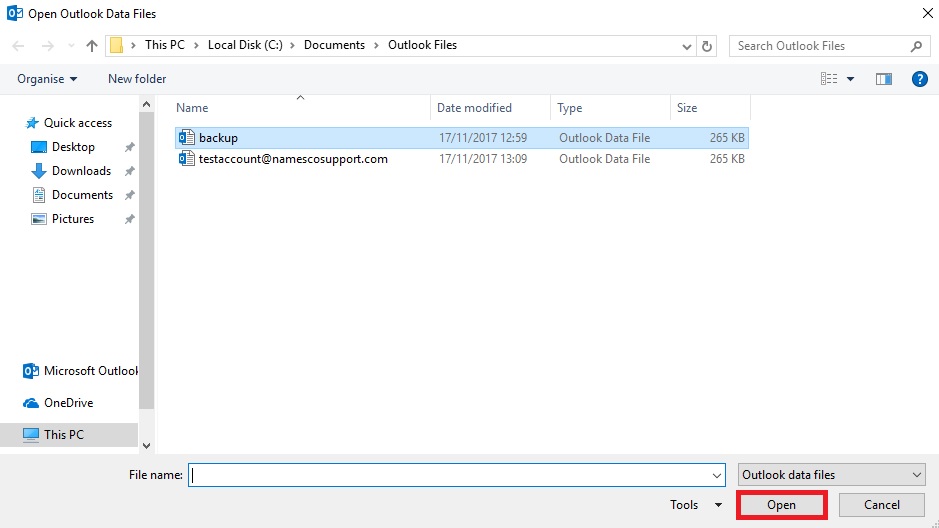
Next, you will need to choose the file you wish to import. Simply click Browse and find the file you originally exported.
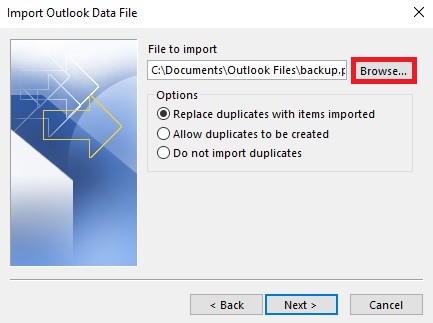
Highlight the correct file, and click Open.
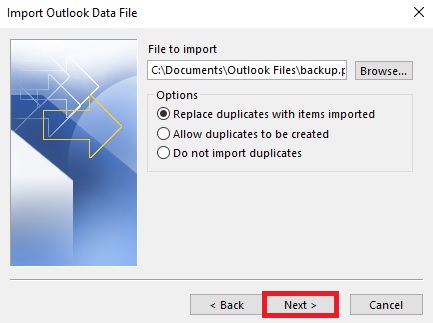
You will then need to choose from one of the options. By default the option for Replace duplicates with items imported will be selected. This means that if any identical email already exist in the email account, they will be replaced by any duplicate emails you are about to import.
Click Next once you are happy to proceed.
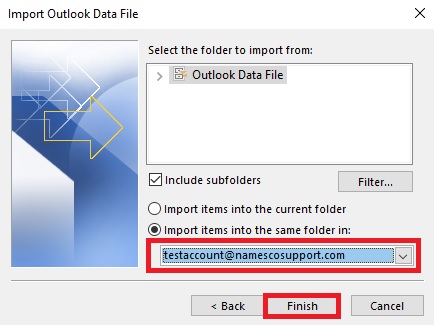
Finally you will need to choose the email account you wish to import the content into by using the dropdown menu.
In addition, ticking the box for Include subfolders will automatically create any folders you previously exported from the original account into the new account, along with any emails contained within them.
Once you are happy, click Finish to complete the import.
Your emails and folders should now have been imported into your new email account.