Billing Options – The Basics
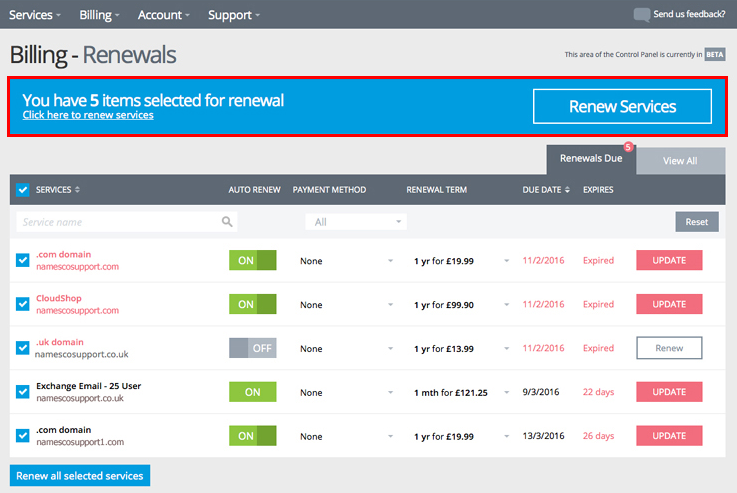
– When you have renewals due you will see an alert here at the top of the page, by clicking on ‘Renew Services’ you can renew everything that’s due.
– This is the Services column which lists all of the services on your account.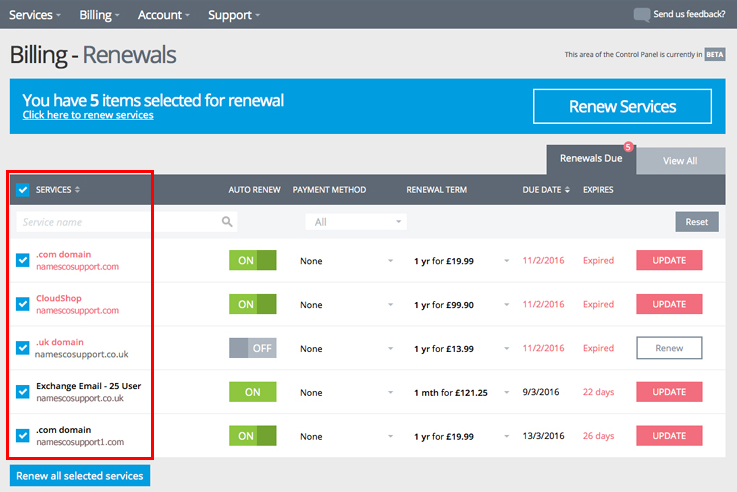
– If there are too many services to view on this page, you can search the services list for the one you’re looking for.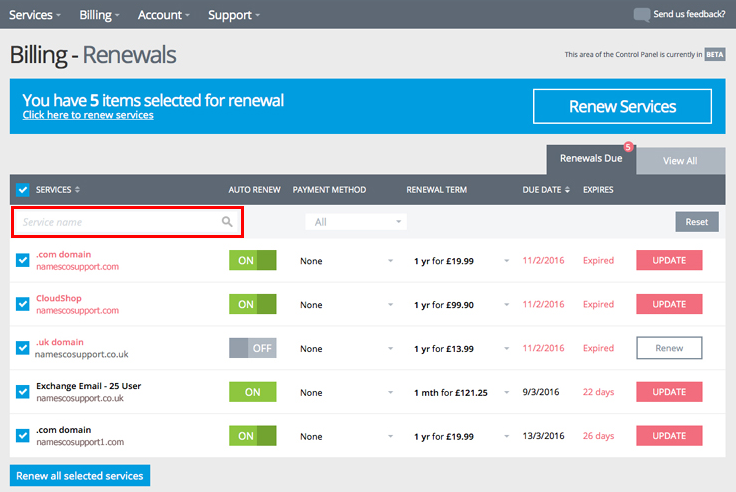
– If you cannot see the service you are searching for and it’s not revealed by a search, you may have to switch tabs to ‘View All’ services, as shown in the image below: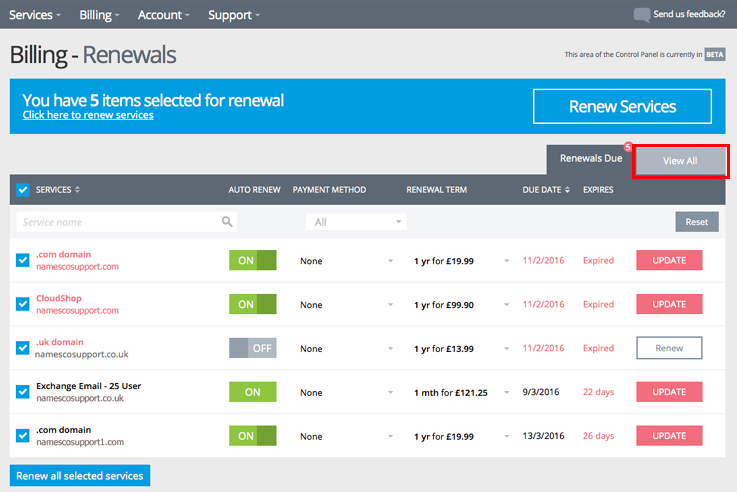
– The Payment Method filter allows you to select all services which have a certain payment method or particular card assigned to them.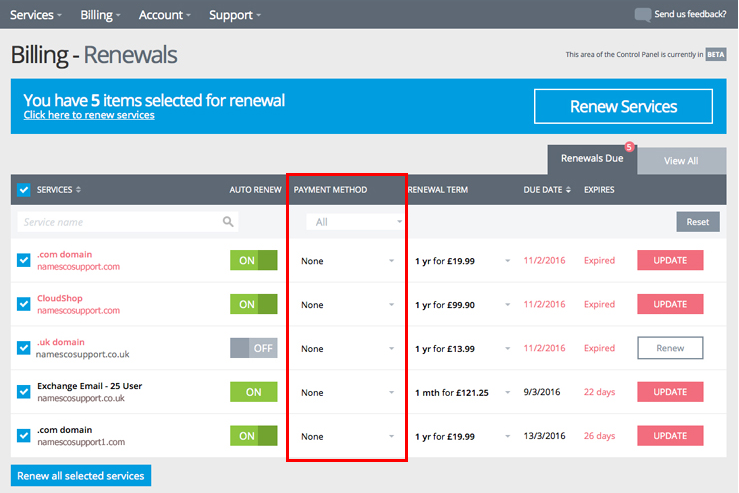
– The ‘Auto Renew’ column allows you to toggle a switch for the renewal of each service. For a service to automatically renew it must be switched on and for there to be a valid form of payment in place, which does not have an expiry date before the next renewal date.
– The renewal term column allows you to switch the period of validity you’ll pay for at next renewal, for example, if you run a business and know you’ll want a domain name for the maximum term of 10 years, define 10 years in this column and the service will renew for 10 years when it next renews. The same as if you make a speculative purchase of a domain and are uncertain it will take off, ensure it’s set to the minimum term and it will just renew 1year at a time.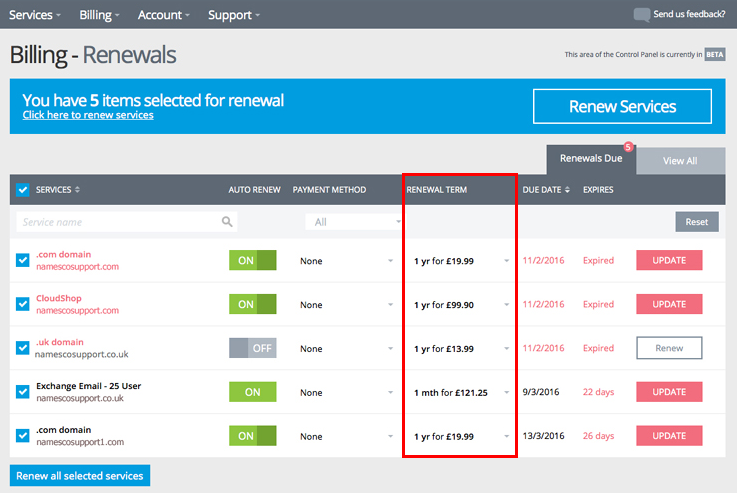
– The Expires column details the timeframe until the next renewal of a service, if the date of this renewal is in the past then the word ‘expired’ will be displayed.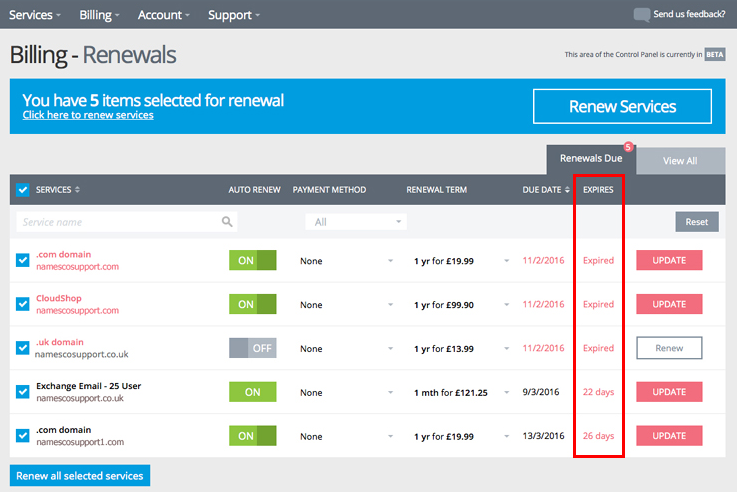
– The Update/Renew column allows you to confirm a change in payment method, so if you have selected a different card from the drop down list in the ‘Paymant Method’ column, confirm the change with the ‘Update’ button.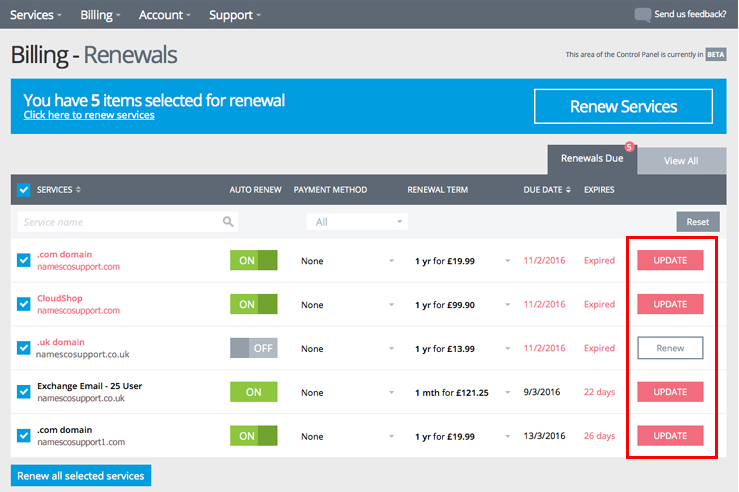
If instead you see a ‘Renew option’ such as in the screenshot below, this is a prompt for immediate payment and upon pressing this you’ll be presented with another screen where you can choose to process the payment using a credit/debit card or to pay by Amazon.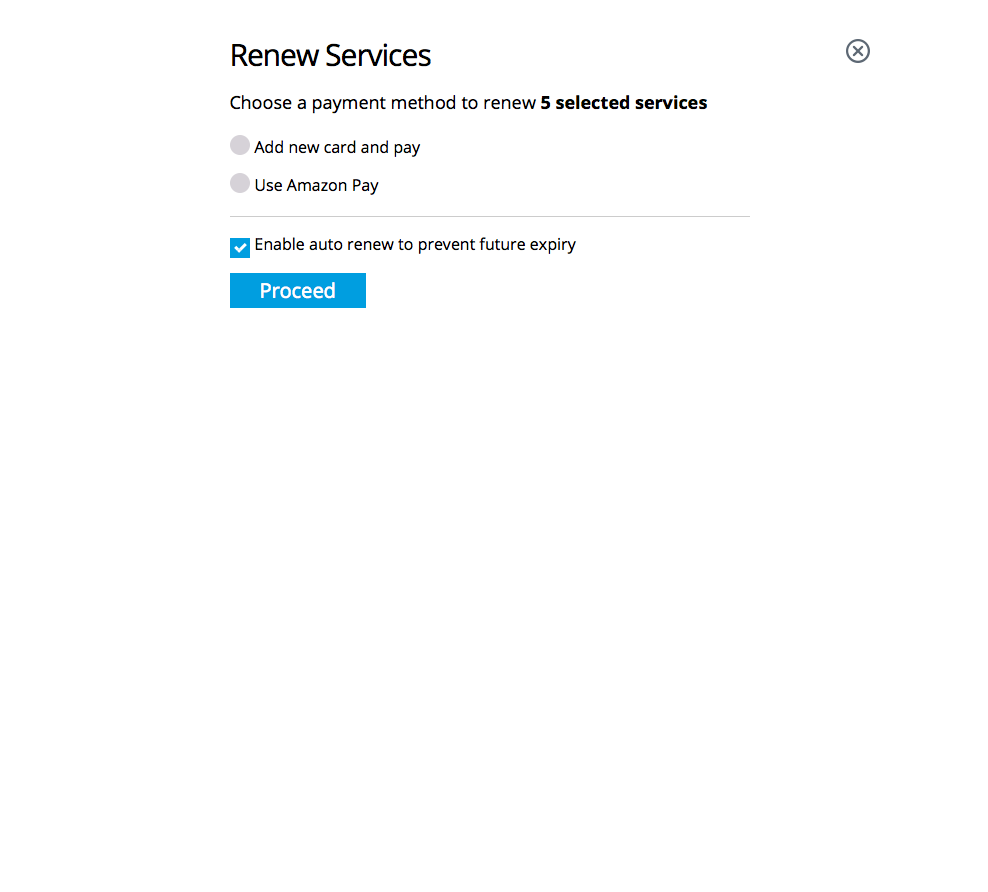
Adding a new card to your account
– To add a new card to your account you must first be logged in to your Online Control Panel at http://admin.names.co.uk.
– Once you’re logged in you should click on to ‘Billing Options’ from the left hand menu.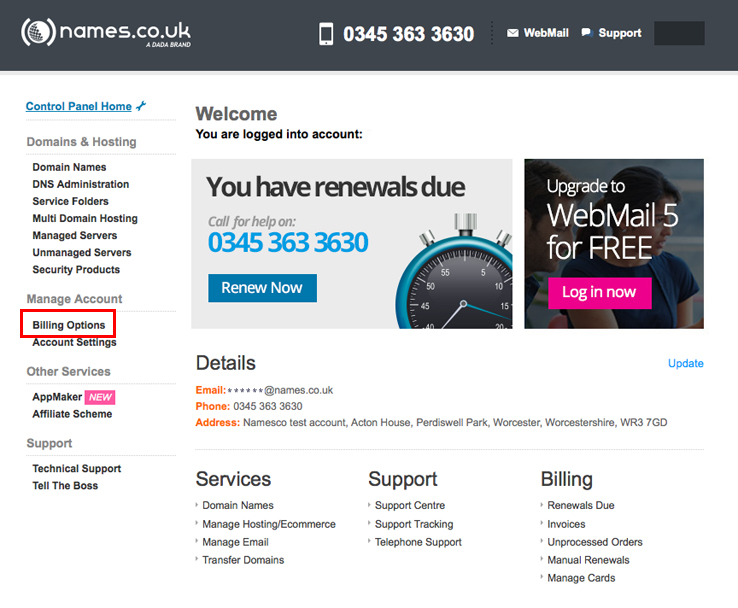
– You will now see the following new options, depending at which stage of development we are with the revision of our Control panel the buttons you click from this menu may revert you back to the old style Control Panel but don’t worry, the functions are all still there.
– By default you’ll be taken to your renewals due page where services which are due within 45 days are shown. You can navigate to view all services if you’d like to manage the other products on your account, by selecting the ‘View All’ tab as shown below.
– Find the service you wish to assign a new payment card to and next we’ll be looking to click the option to add a new card, this option is in the ‘Payment Method’ column a shown below: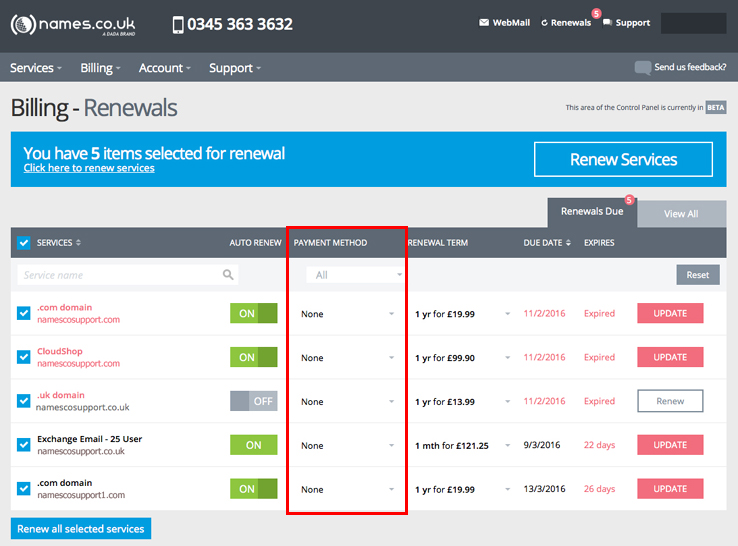
– Next, select the box highlighted in the image below, depending what the field is prepopulated with will determine if it says ‘None’, ‘Direct Debit’, ‘Amazon’ or ‘Card XXXX’ in it, please note that if it says anything other than ‘None’ in the box you may be about to alter the payment method for that service.
– Once you have clicked this drop down menu select ‘Add new card’.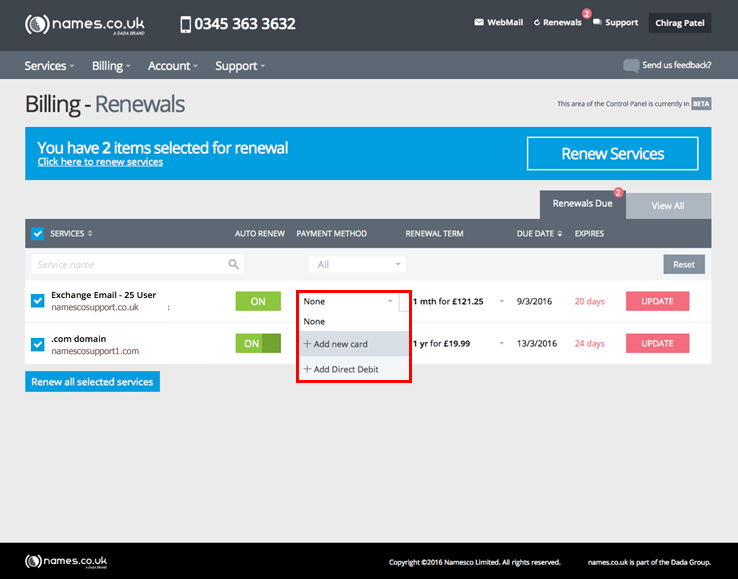
– Next you’ll need to enter the Billing information that’s relevant to the card you are adding, in the case that the card is registered to another individual or company you will need to add that persons name (with their permission) and also the name of the company if applicable, that the card is registered to.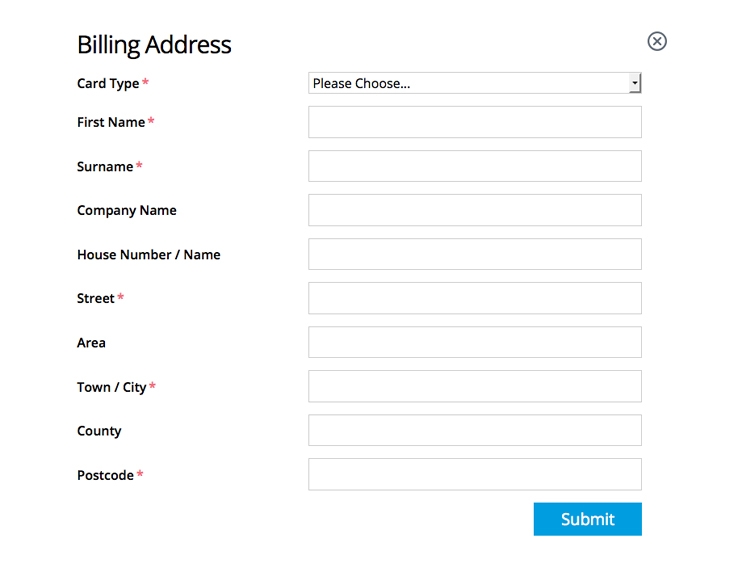
– You’ll now need to enter the card information. Once complete, upon pressing continue a pre authorised amount of 1.00 GBP will be held on the card, this validates the card information and ensures also that it’s an active card too.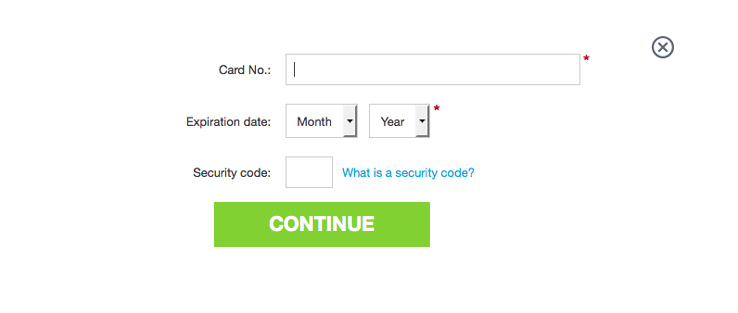
– Depending on your card operator and the level of security you have on your account, you may then be presented with a ‘3D Secure’ page such as that below, where you’ll be asked to pass the next level of authorisation. In the event that you are unable to pass this level of security, it’s recommended that you contact your bank at some point to ask either for this to be disabled or to guide you through setting it up for any of your future transactions using this card. You can call our Customer care team on 0345 363 3633 where they may be able to assist you further.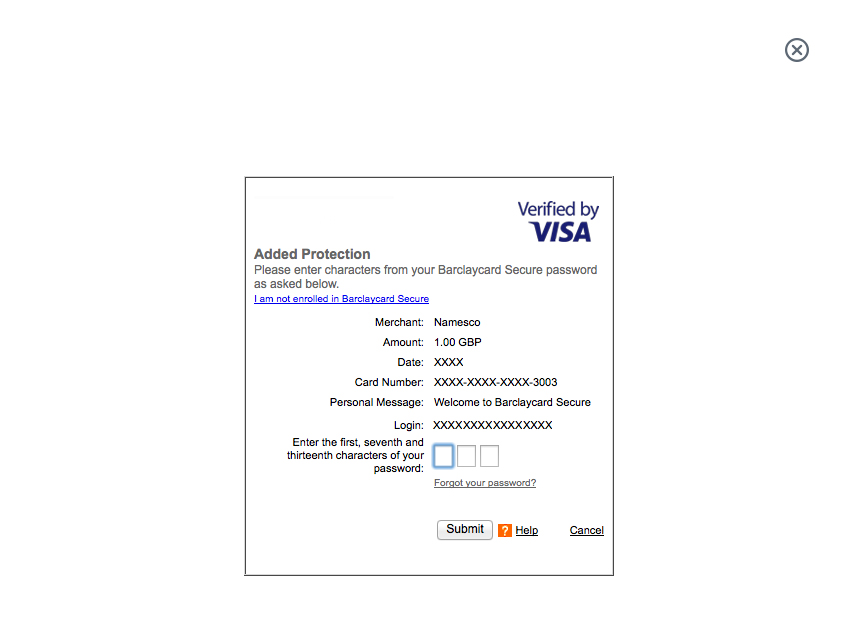
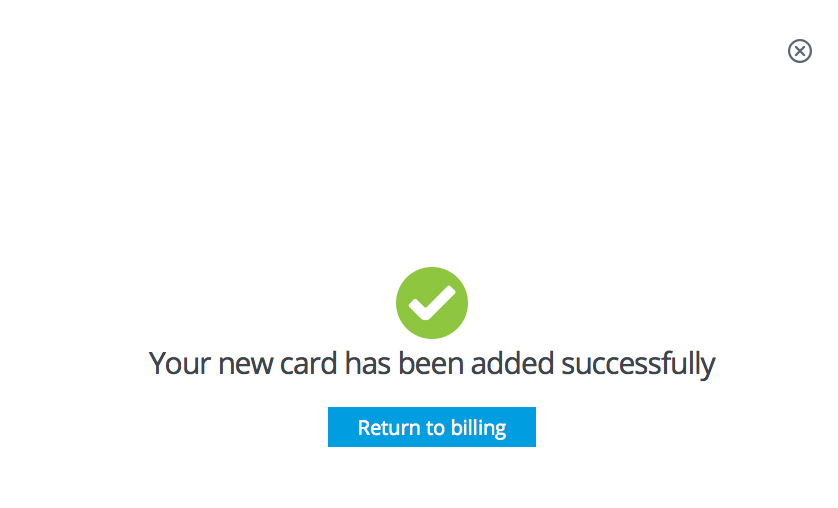
– Once you have added the card successfully, we will confirm this, you can then navigate back to the billing area where the card can now be selected for use with any other products on the account you wish to pay for using the new card.
Setting up a Direct Debit
What is a direct debit?
A direct debit is a financial transaction in which one person withdraws funds from another person’s bank account. Formally, the person who directly draws the funds (“the payee”) instructs his or her bank to collect (ie debit) an amount directly from another’s (“the payer’s”) bank account designated by the payer and pay those funds into a bank account designated by the payee.
Before the payer’s bank will allow the transaction to take place, the payer must have advised the bank that he or she has authorised the payee to directly draw the funds. It is also called pre-authorised debit (PAD) or pre-authorised payment (PAP).
After the authorities are set up, the direct debit transactions are usually processed electronically. Direct debits are typically used for recurring payments, such as credit card and utility bills, where the payment amounts vary from one payment to another.
How to setup a direct debit with your names.co.uk account.
Note: An important point to be aware of is that direct debits can only be setup for monthly packages – if you have a package that is paid annually then you will not be able to pay using a direct debit.
Note: Before proceeding, please ensure that you have your bank account details to hand.
The first step is to login to your Online Control Panel.
Once logged in, if you see the old style control panel with the menu on the left, click on ‘Billing Options’. If you are in the new control panel, select the drop down menu for the product you want to set the Direct Debit up to and click ‘Add Direct Debit'[/bold].

Click on the link labelled Create New Direct Debit.
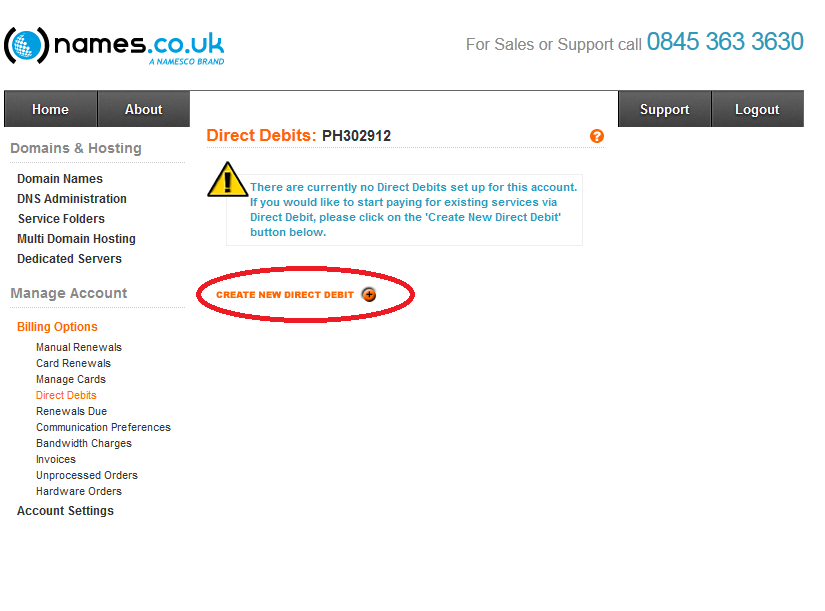
You will then be taken to a page that lists any suitable monthly packages on your account. Place a tick in the box next to the package you wish to setup a direct debit for and then click on Create.

On the next page, check that the information about the date and price are accurate and then enter in your bank account details. The information required is the name of the account holder, the account number, the sort code and the name of the bank. Click on the Proceed link when you have finished.
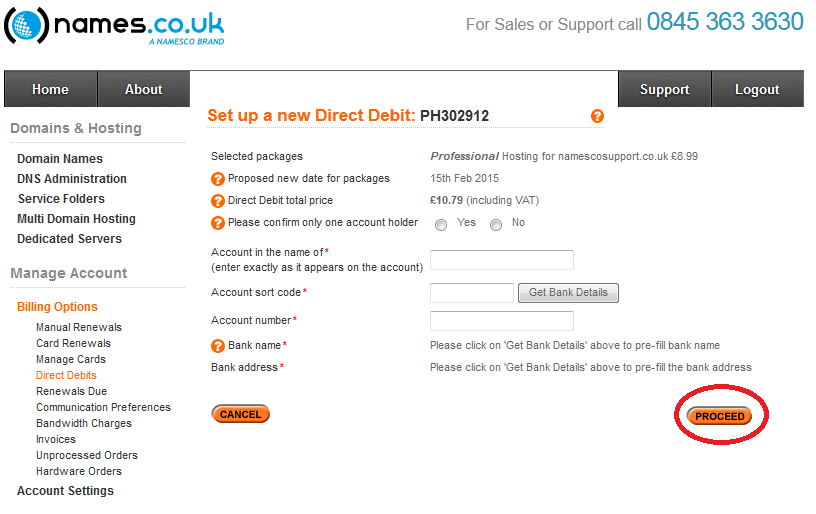
The bank details that you have entered will then be checked and, if there are any problems, you will be notified what they are.
Assuming your bank details have been entered correctly, the last stage in the process is to indicate your acceptance of the Direct Debit Guarantee which will be presented to you on the final page.
Once you have done this the direct debit will then have been created and the package you selected at the beginning of the process will now be paid each month using that direct debit.
Note: You should expect to receive an email or letter from your bank within a week confirming that a direct debit has been setup.
Unable to access Billing or Account tabs?
If you’re unable to see or access the Billing or Account tabs in your Online Control Panel, it’s likely that you’re logged in using a Site Admin account.
Site Admin access is designed to allow management of specific domain or website settings (such as DNS or hosting configuration), but it does not include permission to view billing details, invoices, or account-level information.
To access Billing or Account sections, you’ll need to log in using the primary account holder’s login details. If you’re unsure which login you’re using, or if you need billing access added, the account holder can assist or contact our support team for further help.