Getting started with your Website Builder Shop
Info: This article applies to Website Builder purchases made before 14th January 2025. For further assistance, please contact our support team.
A Website Builder Shop is a fantastic way of selling your products online and increasing your business revenue. In this article we’ll walk you through the basics of getting up and running.
How to access the shop management
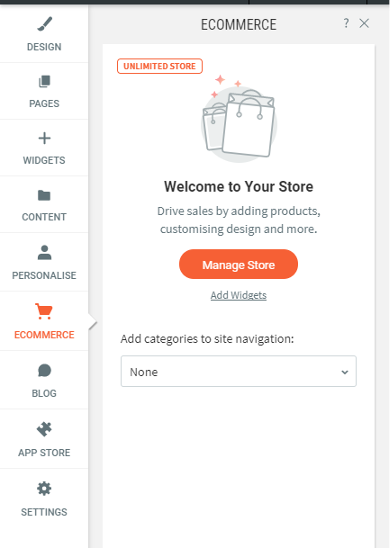
The shop comes with its own administration area which is built in to your existing Website Builder editor. You can access it by clicking on the Ecommerce option in the left menu and then Manage Store.
You’ll then be taken to the central administration area for managing all aspects of the shop.
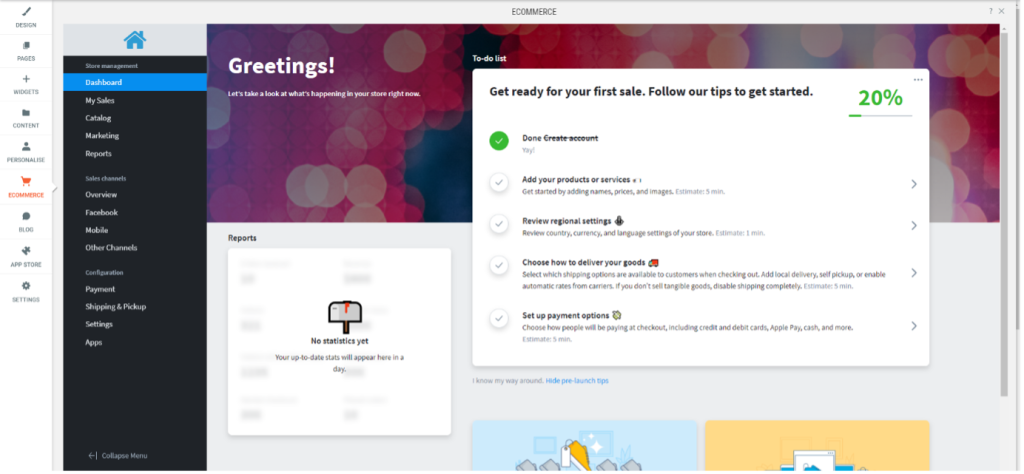
You’ll see there is a useful checklist prominently displayed in the centre of the screen which outlines the key areas of setting up your shop and whether they have been completed.
Adding Products
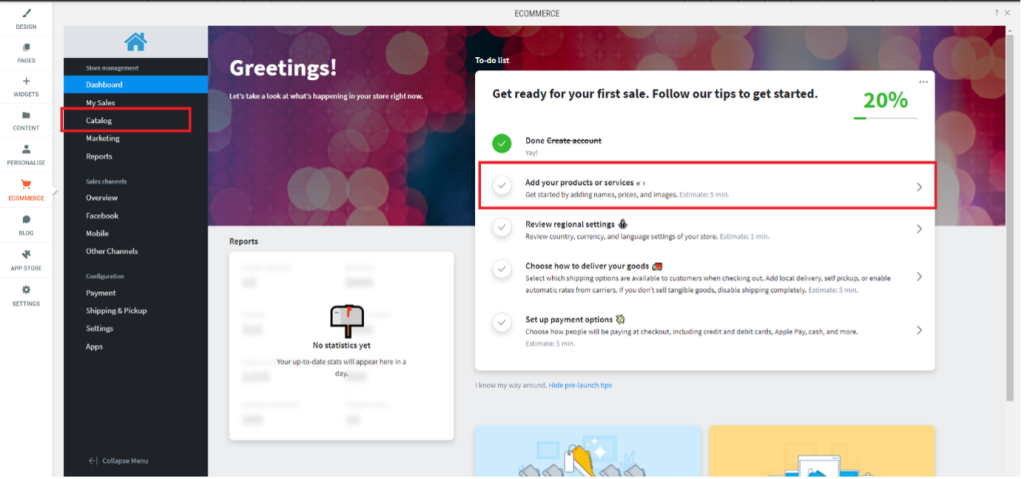
The first step is to add in the products that you wish to start selling online. You can do this either by clicking on the Add your products or services section on the checklist or by choosing Catalog from the left menu.
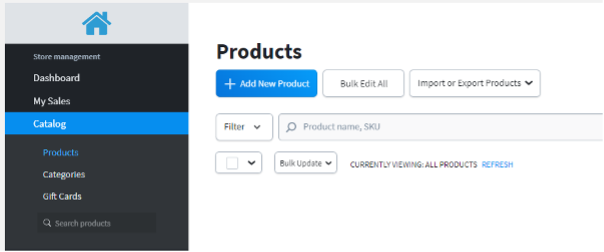
You’ll then be taken to the page that allows you to manage your products. You can add a new product by clicking on the blue Add new product button at the top.
Enter the Name, Description, Price and other product details.
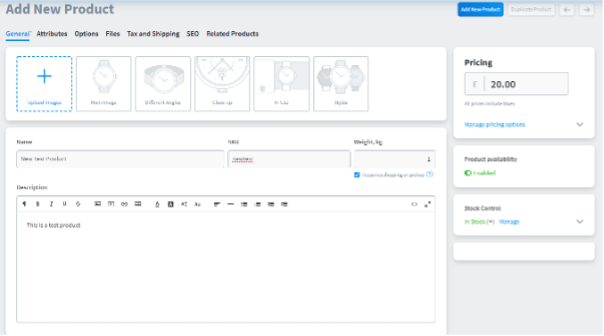
You’ll note there is an Upload Images icon which allows you to upload a picture of the product. You can upload more than one if you like, and they will all be displayed when someone looks at the product on the website.
Tip: Make sure you don’t forget the Weight value. This is an important requirement for setting up more advanced shipping methods, which we will cover later in this guide.
When you have added all of the details about the product click on the blue Save button in the top right. Repeat this process for each product you wish to add to your Website Builder Shop.
Adding Shipping
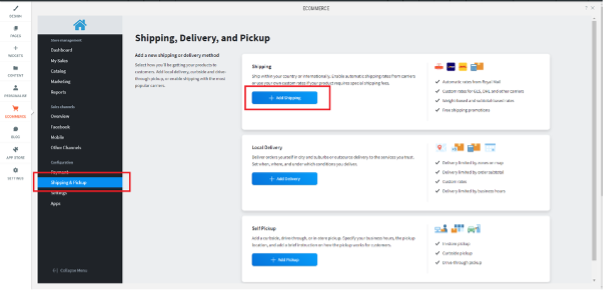
Once you have added the products then you’ll need to setup the shipping options you’d like to offer your customers. For example, perhaps you might like a free Royal Mail delivery service or a chargeable faster delivery service via a courier.
Click on Shipping & Pickup from the left menu and then click on the blue Add Shipping button.
Next you’ll need to choose which delivery company you’ll be using. Some of the more common ones are listed already to make it easier for you.
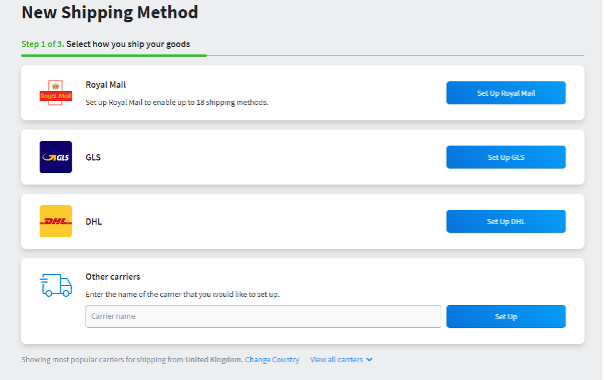
Most online shops use Royal Mail so in this guide we’re going to go ahead and click on the blue Set Up Royal Mail button.
You now have a number of options about which type of rates you would like to use. For example whether shipping will be free for orders over a certain value, whether it will be a fixed rate for all orders, or whether the rate will vary depending on the weight of the products.
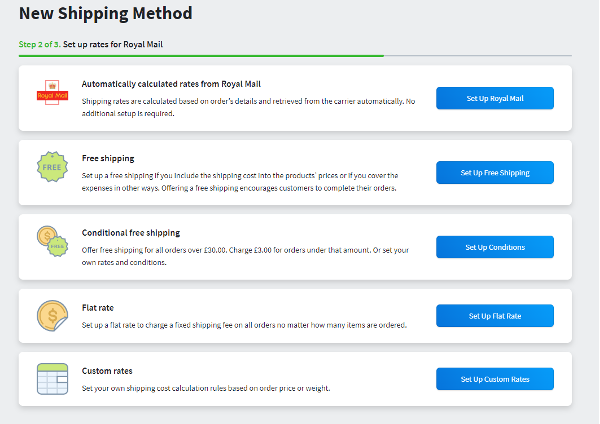
Info: You should make certain that you have added weights for your products when you created them, particularly if you plan to charge a variable shipping rate based on weight of products.
Choose the delivery method that you will be using and you will be taken to a page that allows you to configure it. In this guide, we’re going to choose the Flat Rate option.
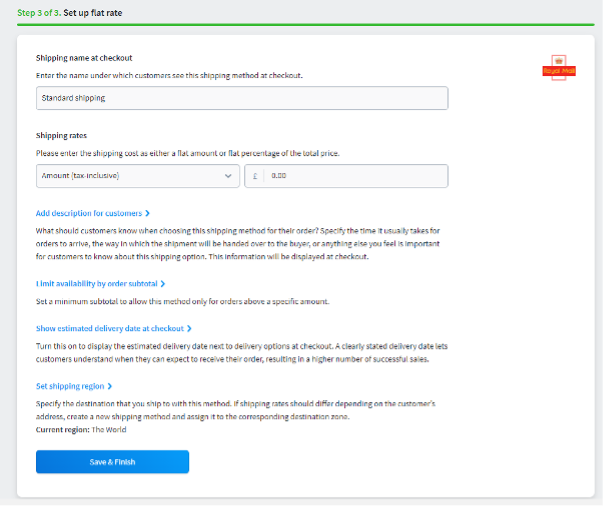
The page you see here will vary depending on whichever option you chose, so you’ll need to fill in the required information and then click on the blue Save & Finish button at the bottom.
Should you wish to make multiple delivery methods available to your customers, then you will need to repeat this process for whichever other ones you would like to offer.
Adding Payment
Once you have added products and shipping methods the final step in configuring your Website Builder Shop is to setup the payment methods, so that your customers can pay you for your products.
Click on Payment from the left menu to be taken to the page where you can choose your payment provider.
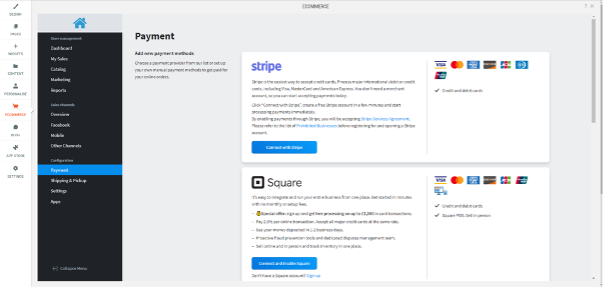
The three most common ones are listed at the top: Stripe, Square and Paypal.
All three of them allow your customers to pay online via credit/debit cards, although they will each deduct a percentage of the money as their transaction cost. You’ll need to research which one of them will be best for your business and how much their charges are.
If you simply just want to accept card payments with the least amount of fuss then Paypal may be the best option, but it is entirely your choice.
The process of activating each payment provider will vary depending on whichever one you select, but will usually involve creating an account with them on their website and then entering the account details into the shop.
Click on the blue Connect button below the relevant payment provider and follow the on-screen prompts to complete the process.
Once you have added your products, configured your delivery methods and setup a payment gateway then you are ready to start earning money with your Website Builder Shop.
Tip: Don’t forget to publish the website via the button in the top right corner of the editor in order for it to go live on the Internet.